
iPad Pro vs XP-Pen Artist 13.3 Pro: the Best Choice for Digital Illustrators?

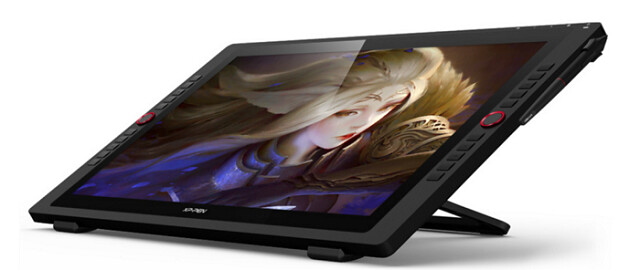
I have both the XP-Pen Artist 13.3 Pro art drawing pad with screen 13.3inch and iPad pro 12.9inch. iPad pro so far I have to admit is amazing.
Portable and easy to use, iPad Pro helped me draw and deliver illustrations while on the aeroplane, on the beach, in bed and in beautiful cafes around the globe.
Creating print-ready illustration on the go is now possible with an initial investment into an iPad Pro, Apple Pencil, and a few free Adobe apps.
Thanks to these new tools being an illustrator don't mean living an isolated home-bound experience like it used to be.

I got the XP-PEN Artist 13.3 Pro ( https://www.xp-pen.com/product/464.html ) , mostly due to cost. It was $330 or so and if you couldn't afford the iPad Pro, It is undoubtedly superior.
I'm very happy with it and I've been using it for a year-ish and have had zero problems. I love having programmable buttons as I have pain in my thumb from copy/pasting and other repetitive keyboard commands, so that helps. Easy to set up, easy to customize for each application.
Maybe not for you, but maybe this'll help someone else on the market for a reasonable graphics tablet.
Choosing a digital tablet: XP-Pen or iPad?
So, you have decided to purchase a drawing tablet. What should you go for: a XP-Pen or an iPad Pro?
Each of these tablets has their pros and cons and a few distinctive differences.
1. The ability to see the image that you are drawing directly on the tablet.
When you purchase an iPad Pro you would be able to see the image that you are drawing, as if it was on paper.
To get the same effect with a XP-Pen tablet you will have to go for a higher spec Artist Pro Series , which need plug in a laptop.
2. Portability.
iPad Pro functions independently from your laptop or PC, so you will have a self-sufficient drawing device everywhere you go.
The models of xp-pen artist have to be plugged into a computer in order to mirror the screen. its just a display. it has no processing power or battery. all cintiqs need a computer.
3. Software choice
XP-Pen is used to mirror the screen of your laptop or PC, so you will essentially be using the desktop version of the software such as Illustrator or Photoshop.
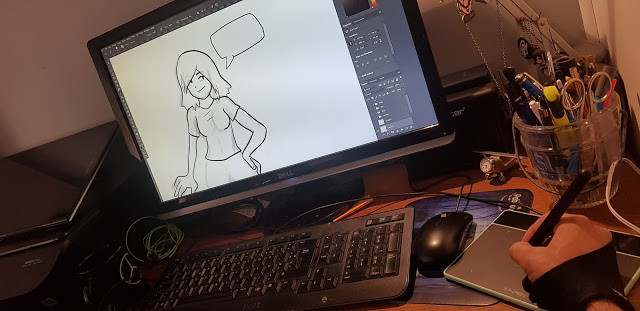
XP-Pen Artist 13.3 Pro is great for use with full Adobe apps on desktop like touching up images in photoshop or creating artwork in illustrator.
iPad Pro is a mobile device, so you would be able to use various apps which have been specifically adapted to deliver smooth mobile drawing experience.
The main issue with the iPad is that you're limited to iOS apps like procreate . There really aren't any fully-featured animation or 3D modelling apps yet.
Procreate on iPad pro is fabulous and can create printable work up to certain sizes, especially if your main purpose is for web, definitely iPad pro is enough. I absolutely love it.
But Recently, there has been some development in animation apps for iPad Pro, which is also very useful for a contemporary illustrator.
4. Functionality
You don't have to use your iPad Pro only for drawing. It will come in useful in other life scenarios, such as checking emails, sharing images on social networks, editing videos and lots more! With XP-Pen, you will not be able to use it for anything else.
Let's compare the two types of tablets in detail.
The ease of drawing with a stylus.
XP-Pen is a professional and well-known provider of creative digital devices like graphic tablets, drawing pen displays and digital pen stylus. XP-Pen Artist 13.3 Pro screen tablet are better when it comes to the most natural feel of drawing on a digital device. it gives me the realistic and precise drawing experience.
If you try an iPad Pro in the store you will notice that its surface is much more slippery. I know plenty of illustrators who like it, but if you are after a more paper-like feel then you can buy a cheap matt screen sticker (I use this one) which will add grip to the screen. Apple is also constantly improving the Apple Pencil, which in itself is quite a sophisticated tool. the iPad pro are good for rough sketching or lineart.
The next argument that the drawing tablet supporters usually give is that graphics tablet works with full versions of Illustrator and Photoshop, providing excellent choice in file resolution and functions.
And indeed, there was a limit in file sizes and resolutions available in apps when iPad Pro first came out. However, the situation is different now. Firstly, Procreate app has always offered a good choice in image resolution and formats. Moreover, Adobe CC developed some amazing iPad apps. You can now get Adobe Fresco, which works with any size and resolution and offers mind blowing tools and brushes.
The two older Adobe drawing apps are Adobe Photoshop Sketch and Adobe Photoshop Draw. They seamlessly integrate with Adobe desktop apps through Creative Cloud. With all these apps you will be able to draw in both vector and raster graphics.
Final thoughts:
When choosing between XP-Pen Artist and Apple iPad Pro, ask yourself the following questions: Do I want to draw in full desktop version of Photoshop with all its functions? If the answer is yes, then XP-Pen is more suitable for you.
I would say a full desktop would have better art programs. Especially if we are talking free. If you just want to doodle, it doesnt matter. If your going to be doing any serious art however, Get a XP-Pen Artist or wacom cintiq tablet. You get many times more freedom on a desktop.
Sidecar , Astropad or Duet Pro app lets you mirror your iPad Pro display, thus turning it into a pen display tablet. But My ipad would overheat (with astropad and duet) and it lags a lot, to the point that it starts making random lines when trying to draw.
How important is it to be able to draw anywhere I want? If you want a light tablet that you can take with you anywhere, iPad Pro is perfect for you.
Do I like to try new mobile apps? If the answer is yes, you will have a lot of fun testing various drawing and animation apps available for iPad Pro. If, however, the thought of exploring new technology gives you more stress than excitement, then you might find it easier to learn how to use XP-Pen, which simply mirrors a desktop version of Photoshop.
In terms of choosing the size of a tablet, think what you usually feel comfortable working on. I have always liked big sheets of paper to draw on that's why I went for a gigantic 12.9 inch iPad. However, you might be comfortable working on a smaller canvas.
Both have different uses and advantages, eventually it comes down to what is your main purpose. My suggestion, if using it professionally, is to buy the one you need first then buy the second later. Both work for me in my line of work. If your main use is adobe desktop apps then the XP-Pen Artist 13.3 Pro. Professionally, both benefit me.

XP-Pen Artist 24 Pro Review: An excellent 2K creative pen display for your drawing needs
It is important for digital artists to have the best tools available. This includes not only software but hardware as well.
A standard graphics tablet for drawing is a cheaper ainlternative to some of the more aggressive product lines being promoted. It will still give you all of the joy of a digital drawing experience at a much cheaper price.
These devices are reliable, affordable, and are some of the best and cheap graphics drawing tablets with screen for digital artists.
Before planning to buy a graphics tablet, you should look for key specifications such as size, accuracy, and pressure sensitivity.
XP-Pen’s Artist 24 Pro has proven to be the go-to tablet for artists to create brilliant designs while increasing the speed of their workflow.
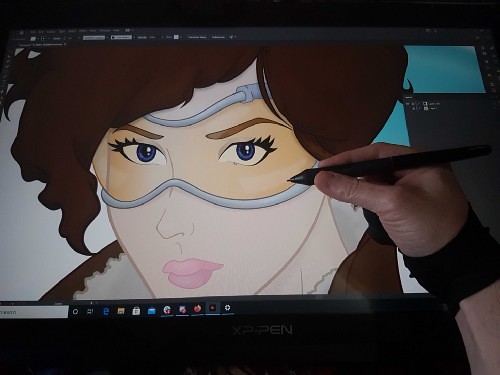
Using the XP-Pen Artist 24 Pro, I created a vector of graphic of Tracer from Blizzard Entertainment’s Overwatch during a live stream on Adobe’s Behance.
First impressions
In the past, I have worked with touch screen computers where I could draw directly on the screen as well as Samsung tablets and of course the iPad. So, this is my first dive into a tablet that did not have a computer integrated into it. What I can tell you from my first impression is that it is just as amazing as any other non-computer tablet out there. In fact, better in some ways.
Actually, I was due an upgrade to my computer anyway… as not only am I a graphic designer and marketing pro focusing on content creation, but I am also a gamer. So, I worked with Agando to create the ultimate PC Tower for graphics, video editing, content creation, live streaming and of course gaming.
Now, you can use the Artist 24 Pro with almost any PC or Apple laptop. I just wanted to really put together the ultimate PC experience. For me, it was important to have a computer that can not only do graphics, but also allow me to game on because of my strong connections to the games industry.

For this vector graphic, I created over 300+ layers. The larger screen of the Artist 24 Pro Display really allowed me to get in there and work on details. In the photo, you can see the various paths used to create the image of Tracer.
23.8-inch 2K QHD Graphics Display
The Artist 24 Pro is 2560 X 1440 pixels. Needless to say, its high resolution will rock you. To do a test, I played Kojima Productions’ Death Stranding with my Artist 24 Pro and BenQ PD3220U design monitor where I was mirroring the displays and I saw no difference. Because of this you can rock software such as Pixologic’s ZBrush or edit video with Adobe Premiere Pro.
According to XP-Pen having such high resolution allows the Artist 24 Pro to deliver vibrant, dynamic and realistic images, with accurate color and deeper contrast. I have to agree with this statement!

Color Accuracy
I think every seasoned digital artist will tell you that color accuracy is essential when it comes to creating graphics, editing photos or producing videos. The Artist 24 Pro will not let you down as it has 90% Adobe RGB accuracy.
From what I am seeing so far from this device, is that XP-Pen is giving their competitors a run for their money. Having a high color accuracy is not only important for graphic designers, but photo retouchers and video editors.
One would assume that the graphic was created in a raster program such as Adobe Photoshop or Clip Studio Paint. However, it is a vector graphic so it is completely scalable.
Connectivity
Having connectivity options allows designers to be more flexible. The Artist 24 Pro comes with 1 x USB-C port, 2 x USB Hub, 1 x HDMI port, and 1 x DC port.
For those without USC-C, it not only comes with a USB-C cable but also a USB to USB-C adapter! That was very thoughtful of XP-Pen to include. XP-Pen provides a list of USB-C devices that are compatible.
Another great thing is that a person can also connect the Artist 24 Pro to Android phones. So not only can you hook up your tablet to a PC, a Mac, but also various Android phones. To me, that is exciting and allows for even more creativity.
Because of all the ports, the tablet also can serve as a hub. Thus, you can hook up other devices to it or even use one of the USB ports to charge your cell phone!
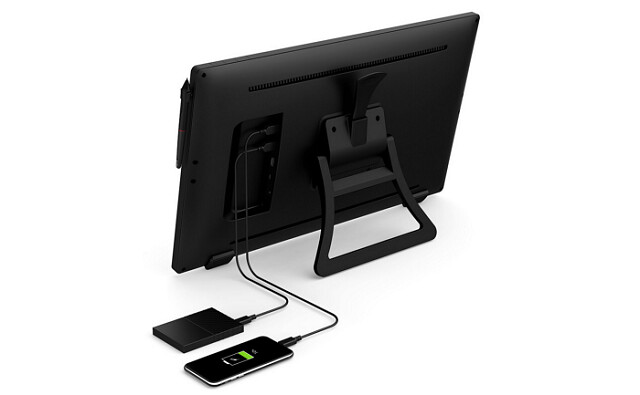
Here we see how one could use the hub to access an external hard drive or charge your cell phone.
20 Customizable Buttons and 2 Dials
Customization is very important when producing tech where various creatives using it to produce different types of artwork. We all have our own unique workflows, thus being able to customize your device is very important.
The Artist 24 Pro has 20 customizable buttons and 2 dials. Not all companies have such features on their tablets or they want you to purchase additional devices. XP-Pen really puts their community in the forefront when designing their devices by giving you the ability to really modify the buttons to match your needs.

Here you can see how you can customize the express keys and dials. I am still debating on how I want to set up my device. I have already made some changes.
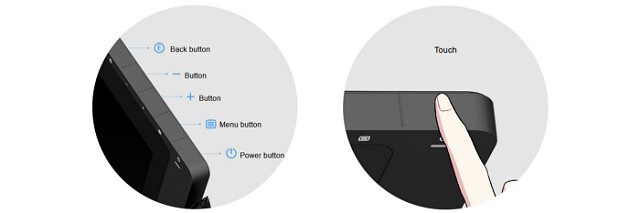
Touch Buttons
The power and menu buttons are all touch-sensitive. This allows you to easily turn off your device and adjust the settings. I normally keep my device on standby so that when I turn my computer on it automatically starts.
Adjustable Stand
The stand is very sturdy and allows for a 16° to 90° tilt. Before getting this device, I had my tablets at a higher angle, but I decided for my new setup to have a lower angle. Guess what? I love it!!!
Additionally, you can remove the stand if you would like to attach the device to an adjustable swivel arm. Being able to switch from the stand to an arm mount really allows you to set the device up the way you want.

Stylus / Pen
The stylus or pen has a similar design to other popular styluses. So for me, it was very simple and quick to acclimate to. The one cool thing is that XP-Pen gives you an extra stylus for FREE! Yes FREE! You get two of them.
Technical Specifications
Visit the XP-Pen Artist 24 Pro official site page here : https://www.xp-pen.com/product/602.html , you can see the full list of specifications for the XP-Pen Artist 24 Pro.
Driver
You will need to install the driver on your computer. Have no fear, XP-Pen has you covered. Inside the packaging is a card with a link for the drivers. It does not take very long to download and install. So do not worry, you will be up and running quickly.
Experience Using a XP-Pen Artist 24 Pro display
I have been using my Artist 24 Pro tablet on several projects using software such as Adobe Photoshop, Adobe Illustrator, Adobe InDesign and Clip Studio Paint. Because I have worked with various tablets in the past, I can honestly say the performance has been amazing.
I love the natural feel of the device. The stylus (pen) has the perfect weight and balance in my hand. The texture of the display on the tablet reminds me of paper as opposed to glass or plastic. Thus, when I draw my stylus does not slide uncontrollably, which is one thing I hate about drawing on an iPad (which has a glassy feel to it).
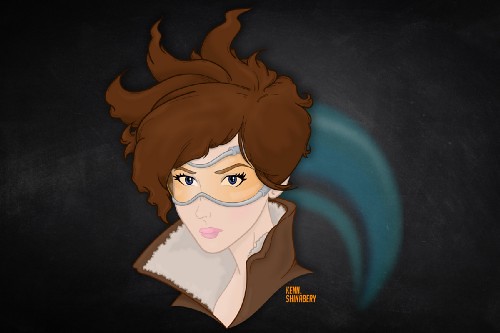
Here you can see the final image of Tracer. The background was created using Adobe Photoshop, but everything else was designed in Illustrator.
XP-Pen also offers several tablets. So you are not limited to the Artist 24 Pro, you can visit their website and find the right graphics tablet that will best serve your needs.
Thus, I can say if you want an amazing touch screen display tablet with amazing precision and spot on pressure sensitivity then the Artist 24 Pro is an amazing device. However, if you want something smaller… then do not worry XP-Pen has your back with a variety of other tablets!
If you do end up getting a XP-Pen display or tablet let me know in the comments below. I would enjoy hearing how much you love your device.

Digital Illustration Using a XP-PEN Deco 01 V2 Graphics Tablet
In today's tech-savvy world, a graphic drawing tablet is a graphic designer's best friend. With thousands of features and functionality, a drawing tablet grants a vast spectrum of flexibility to a designer.
But every artist has a unique style. A drawing tablet that works for a particular graphic designer might not suit your style. Hence, choosing the right drawing tablet is important.
Graphics tablets offer intuitive controls over brushes that emulate natural media while increasing precision and speed.
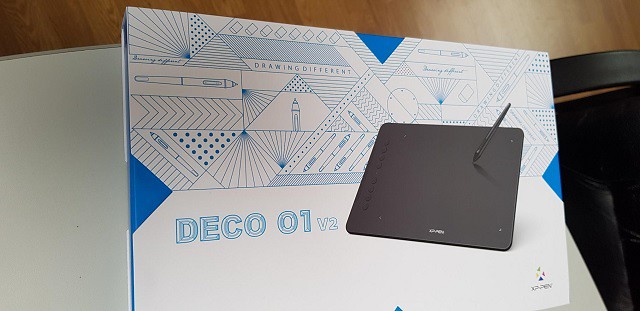
Yesterday I received a XP-Pen Deco 01 V2 ( https://www.xp-pen.com/product/461.html )drawing tablet as I had never used one before.

The XP-Pen Deco 01 V2 is a moderately priced drawing tablet for beginners and entry-level users. It is excellent for practice and to improve your drawing skills.
It has a high value of pressure sensitivity of 8,192 levels , 60 degrees of tilt function and a fantastic resolution of 5,080 LPI. The stylus is battery-free, though, which is an excellent plus-point.
The active area is 10 inches wide and 6.25 inches long. It does not have a battery, which means that you have to connect it with a power source that is a laptop or a computer.
The Deco 01 V2 is only 8mm in thickness and is designed for both right-handed as well as for left-handed individuals. It has eight customizable hotkeys and a USB-C port.
It is an excellent value for money tablet that has a variety of unique features for an entry-level user product.

They are better than a mouse when using programs like Photoshop. I have been experimenting with Photoshop recently and enjoying it more than I thought I would.
At first, I found the drawing tablet and stylus pen hard to use as it was new technology, though I soon got the hang of it and found that I liked using it. The XP-Pen tablet was easy to use, and I think its simplicity made me enjoy using it more.
I liked how I could write text with it in my handwriting. Using the stylus pen allowed me to draw in a more precise way. I expanded on my work with brushes, continued from last week, playing around with the different designs.
I like the idea of sketching with a drawing tablet, using the Photoshop layers to trace images in a way that is akin to my actual sketching style. The ease of being able to draw directly into a computer program (rather than having to scan things in) also appeals to me.
Recently I have found that I am much less averse to creating art and designs digitally, possibly due to discovering all the artistic effects and possibilities available on certain digital programs. These programs have certain benefits that analogue methods don't (such as an ‘undo' button).
I'm still interested in analog, handmade methods of creation, but I am glad that I have stepped out of my comfort zone slightly to use digital programs and equipment – I am always interested in combining these two processes (analogue and digital). I could use a drawing tablet when working on my new brief, which is based on typography.
It is fun to draw on the digital tablet, and it is getting a little easier to get it to do what I want everytime I sit down.

Test XP-Pen Deco Fun: A Budget friendly Drawing Tablet for budding artists
With a graphic tablet you can draw on your computer! Your screen will turn into your canvas.
If you do any type a graphic design, digital design, digital art and marketing graphics there will come a time that you will need some new equipment to take your skills and abilities up a notch. I highly recommend XP-Pen products.
Graphics Drawing Tablets for PC have come a long way in recent years. Gone are the days where the only game in town was a Wacom Intuos. Now, there are options to suit all budgets – from powerful, feature-packed pen displays with high-resolution touchscreens, to mid-range and cheap drawing tablets that balance price with power.
XP-Pen was founded in 2005 and in my opinion, whether you're interested in painting, drawing or photograph retouching, it is the company you should consider when looking for a graphics tablet.
Recently, XP-Pen introduced a new addition to its Deco family: the XP-Pen Deco Fun with XS, S, L three sizes and four different colors. Since I've been a XP-Pen tablet user for many years, I couldn't wait to get my hands on it.
The first thing I noticed was that XP-Pen now offers a bewildering selection of entry level and mid range tablets.
These “entry level” tablets are the XP-Pen Deco Fun Series. Prices vary because their sizes vary by tablet. They feature a smooth drawing surface and Android compatible with Android, Chrome OS.
For my tests, I bought the whole models of the Deco Fun range.
Unboxing the XP-Pen Deco Fun

When I first got it I was really excited because I'd seen on Youtube all the unboxings and the interior of the box is really nice!
It's a beautiful box for storing your tablet in! Underneath the tablet is a compartment for the cable, that connects it to your laptop, and the manual.
Once you buy it, you'll get:
– The actual Tablet .
– The pen with buttons .
– 1 Pen Clipper and 10 extra nibs
– A booklet containing information on the tablet
– a USB connecting cable

Models
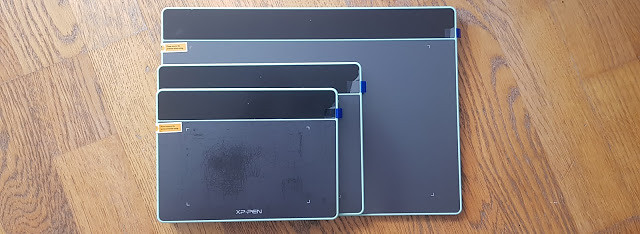
There are three versions of the Deco Fun. The price depends on the size you get too, obviously the bigger, the more expensive.
Extra Small ($29.99) — This tablet works well for those looking for an ultra-portable design as it measures 182.4 x 134.7 x 10.5mm.
Small ($39.99 ) — This size is my personal preference at 210.5 x 159.8 x 12.9mm. This matches my laptop well and easily fits in the bag for on-location work. Its large enough to use comfortably at a desk.
Large ($49.99) —This size works best for illustrators or those with a large work area. It measures 315 x 222.9 x 12.5mm.

Info & Features:
Here is some information and features about the tablet:
– The tablet has no buttons on the side to customize .
– There are additional 2 buttons on the pen.
– you can connect the tablet with its USB-C to USB-A type cable.
– The XP-Pen Deco Fun has also great pen pressure sensitivity.
– It has about 3 sizes and four colors ( Classic Black, Space Blue, Apple Green, Carmine Red ) to choose from.
– The small and Large Size tablets do have tilt feature.
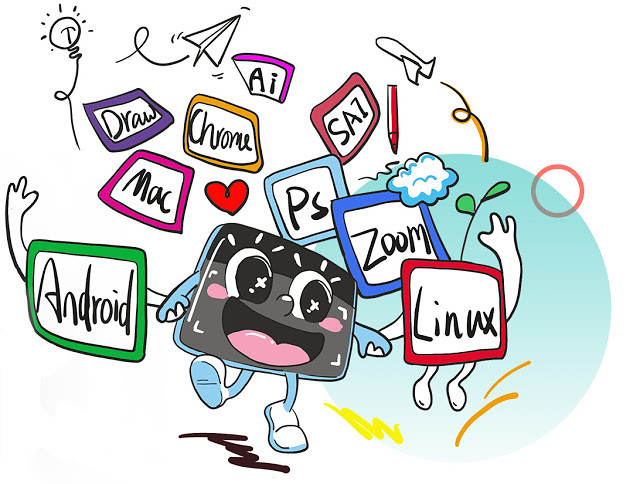
– tablets supports Window , Mac , linux , Android connection and is widely compatible with Chromebook devices.


The Deco Fun is a simple entry into pen and tablet-based photo editing and illustration on a budget. While not as large as pricier options, and serving only as a map of the screen and not an actual screen, the Deco Fun' pressure sensitivity simplifies and speeds up many types of brush-based work.
Here's the official website for the XP-PEN Deco Fun: https://www.xp-pen.com/product/905.html
Install the Driver
Getting used to the tablet also involved getting the hang of how the pen worked on the tablet's surface. Much of this was made flexible via the tablet driver.
Once you have your tablet, you need to install all the drivers so it all works properly, which is a very simple task to do and shouldn't take up a lot of time.
Just Go to the XP-Pen official site drivers page. Click Download next to the latest driver that corresponds to your computer's operating system. Follow the prompts to finish the driver installation.
The Driver will help you to make relevant modifications on pen pressure to helping it feel akin to an actual pencil.
Tech Review

The tablet surface corresponds to your computer monitor; moving the pen over the tablet is analogous to moving your finger on a track pad — the movement is in your hands, but your eyes remain forward, looking at the monitor. While it sounds less intuitive than drawing directly on the screen, in practice it feels natural.
Made from smooth black plastic similar in feel to the Touchpad on a Laptop, the XP-Pen Deco Fun should look right at home on most desks. The majority of the tablet is taken up by that work surface, which measures 6.3 by 4 inches on the small model .
Four rubber pads underneath provide grip to carry the tablet steady while you're working. While constructed from plastic, the Deco Fun feels well-built for the price. I did find that with enough use, the pen will leave tiny scratch marks in the surface of the tablet .
Use the Deco Fun feels like the you tried to type without looking at your hands. Watching the screen instead of your hand while drawing feels strange, at first, but that odd feeling slowly fades the more you use the tablet system until it feels just as easy as typing.
In fact, employing a separate tablet and monitor — versus drawing directly on a screen — may even be a plus, as your hand doesn't physically block your view of your digital canvas.
My experience with it
Digital Painting experience
After installing the XP-Pen Deco Fun, I began exploring the digital medium landscape by trying out the paid software offer of Photoshop CC , alongside various other different free software including Medibang Paint, Gimp ,Krita, etc.
The bundled software ( ArtRage Lite ) doesn't do much for me . I think it's better to buy a Deco Fun and then buy whatever software you want to use with it.
The drawing surface is awesome: slick and smooth with no skips or lag. XP-Pen has always made quality tablets so there's no surprise that the pen responsiveness is spot-on.
The product does have its downfalls, The real difference between this tablet and its predecessors (and other tablets in XP-Pen's lineup) are the customizable hot buttons down the side of the tablet.
you can using it replaces drawing paper, pencils, watercolors, and just any other art tool you could think of!
A lot drawing programs are free, so once you get a tablet, you are essentially ready to go.
Since tablet stylus acts just like a pen, paintbrush, or whatever you want it to be, the table itself senses pressure. The biggest edge the Deco Fun has over a mouse is the pressure sensitivity.
More pressure creates smaller, darker strokes, while less pressure creates a line as large as the selected brush with more edge gradient. The pen doesn't mean you never need to choose a brush size, shape, or edge again, but the pressure sensitivity allows you to urge that maximum brush size or just a fraction of that selected brush with light pressure.
This makes it so that when you press hard, the lines made are thicker and darker, just like in real life. You can easily draw and color like you would on regular paper, except with more tools that you couldn't use in real life.
Use Deco Fun Graphic Tablet to Edit Photos

The main benefit to a tablet when photograph retouching is not as obvious as you might think. The precise movements compared to a mouse are nice but actually being able to change pressure on the pen is equally as useful, especially if you are dodging and burning.
While the Deco Fun is the most time-efficient when using the pressure sensitivity, the tablet-based editing feels more natural for a number of other uses. Using the pen to tap out blemishes with the healing tool was slightly faster than using the mouse, but it also felt more natural and, frankly, helped me in making a tedious task a bit more enjoyable.
If you think you'd be better/faster with a tablet, you should seriously consider getting one. Illustrators, cartoonists, animators, photographers doing retouching/editing by mouse would all benefit from a tablet.
I use the pen stylus even for video editing. Period point blank, holding a pen is going to be more accurate and efficient rhan holding a mouse for any computer task you can think of, at least for me.
Works with Chromebooks

This entry level tablet connects to any Chromebook with a USB cable and then you use the included stylus to draw like you'd normally draw! I've used a similar product from XP-Pen before to draw out math equations and it worked really well.
Supported on Chrome OS 88 and later, and Kernel version 4 and later(including 4.4, 4.14 and 4.19).
If your Chromebook has a touchscreen, the lag on some of those can make drawing accurately nearly impossible.
There are plenty of drawing apps for Chromebooks . You could use this for art (obviously) but also for students who want to show their math work.
This most likely has very little lag and the price makes it very affordable to boot.
Also when you buy the deco fun tablet you will get the three-month trail of Explain Everything whiteboard app ( just like Google Jamboard , Openboard and MS Whiteboard ) license .
Just download the app on your device to use to draw and open the board in a browser to screen share (or just send them the share link to view) and they can see what you draw.
I've been using the xp-pen with OneNote and PowwrPoint and it's worked great. You get used to coordinating the pen with the screen pretty quickly. it's great for online courses .
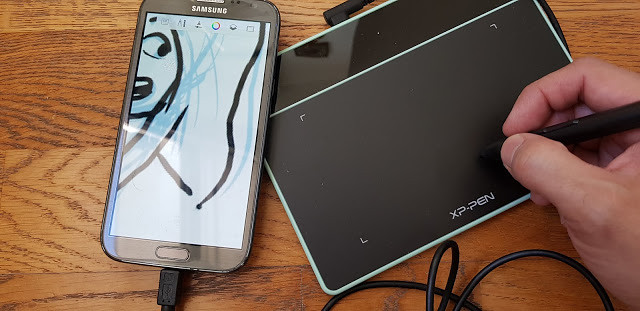
Support connect to your Android phone or tablet!

you need to download a driver to your pc and connect the tablet to update the tablet's firmware . after that its suppoused to work as intended.
It doesnt work with bluetooth it has to be connected using usb otg ( not come with , you have to buy one by yourself ) .
I connected my XP-Pen Deco Fun to my Samsung Galaxy (my phone came with a special adapter) and it technically works. However, you can't see where the pen is but you can still click and draw.
inixPint X this one support pen pressure and Sketchbook are my favorite apps . also with also medibang paint and adobe sketch ( idk why those 2 dont support pen pressure , But you can still draw. ).
Conclusion
The XP-Pen Deco Fun is the perfect tablet for anyone to start their journey in the digital medium. The added bonus of the free software, and relatively cheap prize makes it a perfect comic for the budget artist.
If you're looking at buying a Drawing Tablet, I definitely recommend getting a XP-Pen Deco Fun. For a beginner, it's perfect, not difficult to use and great results.
I'm thrilled with it and happily using it to sketch and paint in Photoshop.
If you do a lot of retouching, photography editing or even drawing, you should buy one, in my opinion. It's a solid product with minimal problems.
If you draw a lot, I would consider a XP-Pen Artist 12 Pro Drawing Tablet With Screen . I do not think you'd benefit from a screen with photograph retouching, so I do not recommend getting the more expensive model if you're only interested in photography.

7 Best Software for drawing illustrations and manga digitally

Hi guys! I write about art resources and tutorials and I think letting more people know about free art programs decreases the barrier to entry in the creative fields, so here is the full text from a round up on free art programs.
Let me know in the comments if you have a favorite you'd like me to add! Hope this helps somebody!
Paid software often is the industry standard and there are many amazing options there too.
Out of the plethora of free digital art software available, these are my favorite picks for free drawing software, including a few open source digital art software projects.
What Is the best digital art program to start with?
The question everyone seems to have an opinion about, but instead of opinions let me give you one well known fact, digital drawing software tends to be super complicated : open up Adobe Photoshop for the first time and you will have no idea what to do because there are just too many choices, most of which are btw completely irrelevant to a digital artist, especially a beginner.
Krita, a commonly recommended starter software that I myself in fact started with, has the same issue and corel painter is certainly no easier. Medibang and firealpaca are also quite bloated with features but not as far gone as these others I've named.
I've tried almost all digital painting software I could find on the internet, so with that said here are my winners for best beginner software, and my logic for recommending them.
I can name some really-well known ones and I'll say my own personal opinion about them.
7 Best Digital Painting and Drawing Software
1. Paint Tool SAI
Works on: Windows Only | Price: $50~

Personal opinion: The most beginner friendly general purpose painting software with a bite stronger than it's bark. Also possibly the most lightweight painting software .
I know it's not exactly dirt cheap (pretty cheap though) but trust me when I say that for a beginner this is a worthwhile investment if only to streamline your learning experience and ease you more gently into the digital drawing experience.
The reason I recommend this as the ultimate software for a beginner digital artist is simplicity, this program is very much straight to the point and doesn't have any features or weird unexpected buttons you won't know what to do with.
the entire program is centered around painting and only painting and doesn't allow itself to get bogged down or overcomplicated by including features that not everyone would use, it has a clean and simple, intuitive user interface, making it easier to learn than all other digital painting software of comparable capabilities.
there are many great artists who use this software professionally so don't be fooled into thinking it's only purpose is to be your training wheels, you could end up loving it for decades .
It also helps that it's cheap with a 1 time payment of $50~ as opposed to say $10 a month for photoshop which would fast accumulate to $120 per year.
This program has a simple, to the point user interface, simple yet solid and fast brush engine, it is tried and tested, has been around and loved by it's users for years, it is lightweight and feature complete, it is the perfect starting point for any first time digital artist.
2. MyPaint
Works on: Linux, Windows and MacOS | Price: Free And Open Source!

Probably the most grounded in simplicity from the first line of code to the last, this program was made with beginners in mind and many advanced artists swear by it as their go to tool for quick painting and sketching purposes.
MyPaint is a bit of an underdog, I've seen a handful of people swear by it and at a glance after you first open it it would seem like it's simpler than the above two... But it has a major flaw, the default UI setup is ridiculous, so unless you have the patience and know-how (e.g. to know that this is what you want) to set it up something like this yourself manually, this is one of those programs where you will just open it up and have no freakin idea what to do not because there are too many buttons, but because there are too few .
I also noticed that the download links can be a bit wonky and you have to manually select the 32 bit or 64 bit installers when you download (if in doubt, select the 64 bit/w64 ).
This program is perhaps the only one that was effectively designed in such a way that you can just open it up and paint, no hassle, from the moment you open it you have an infinite size canvas to work with, in other words you don't have to worry about setting your canvas size, it's already "as big as you need" without getting into any technical details :la: and I find that neat.
It's really not that hard to set up, in fact I'll walk you through it.
Open the "Window" menu at the titlebar
Now click the following in this order:
Preview Panel
Color Adjusters -> HSV Square
Layers Panel
Brush Groups -> Classic
Tool Options Panel
If everything goes well, the first 3 should be on the right side of the screen and the last 2 on the left side and now you have a perfectly solid UI. If however something went wrong, you can drag these panels around by clicking and holding the icon in their upper-left corner .
After setting this up and playing with the classic brushes you can start exploring more of the program and set up things like the "Favorites" Brush Group, creating your own Brush Groups and even creating your own brushes : just make sure you always select the "Freehand Drawing Tool" (aka brush tool) in the top menu bar.
Also be careful not to go too crazy on the zooming out, you'll end up with a humongous file hehe Sweating a little... (takes forever to save, and brushes will get slower if you make them too huge; note that this issue affects all software, not just MyPaint ).
3. Medibang Paint or FireAlpaca
Works on: Linux, Windows and MacOS | Price: Free

While the UI design could be better, these programs are very well rounded general purpose drawing software with a very to-the-point feature kit and a hard to beat $0 pricetag!
MediBang is a relatively recent addition to the free software list, it started out originally as a program called OpenCanvas, MediBang as well as FireAlpaca and Jump Paint (a medibang derivative) are all effectively just 'lite' versions of OpenCanvas.
FireAlpaca has animation support while medibang has some manga-creation features instead and Jump Paint is a customized version of medibang tailored towards mangaka and also has lessons on how to create pro quality manga by JUMP's editorial department : so if that's something you want then yeah, maybe go for Jump Paint instead of MediBang, that's bound to be some valuable data for you .
MediBang and FireAlpaca don't do as good a job of being simple and to the point as my former 3 mentions, I'd say their UIs are rather unintuitive in comparison, but it's certainly simpler than most other alternatives, so there's that.
MediBang or FireAlpaca would be a good starting points but their learning curve is steeper than of the above programs , and not due to how many more features it has but more due to poor design choices.
however on an Android Tablet PC MediBang may possibly be the best choice you have, the only other option I know of would be (Corel) Painter Mobile (which is free but you need to pay a little for their brush engines, which is kinda retarded since it's the main part of the program but it was pretty cheap so meh, I really really liked painter mobile's sketch brush engine ) but MediBang is still a very sold program.
So is FireAlpaca and I assume so is Jump Paint but the full experience is only available in OpenCanvas .what a confusing series of programs.
4. Krita
Works on: Linux, Windows and MacOS | Price: Free And Open Source!

The current king of free painting software, it is by far the most feature rich free painting software, it's open source, and does it's best to compete not only with photoshop but also corel painter, it sadly does not fully beat either of them at their own game, but instead it beats both by offering features that corel painter doesn't and offering brush engines of superior versatility to Photoshop's.
This program has room to grow and there's no telling if in a few years it'll be the next digital painting behemoth, or the next digital painting vaporware. It could afford to be more noob friendly though and lacks the capabilities to do clean rendering .
I used Krita because as a painter I preferred it over photoshop : but ultimately found some problems in how it handles soft brushes and blending with them .
Krita will again be a solid alternative for me, and even without this, for rough painted looking styles Krita is rock solid, and no program besides photoshop that I'm aware of can beat Krita in post processing and image manipulation tasks. so Krita is undoubtedly one of Photoshop's by far strongest competitors.
if none of the previously mentioned programs sounded like a very good fit, either you need to look at vector illustration software or this is probably the right fit for you. It has many cool brush engines but overall I'd say nothing that really stands out (it's sketching brush engine is sublime tho) compared to formerly mentioned software.
Krita also has animation support and some minimal vector drawing capabilities as well as some manga/comic illustration features, besides photoshop it's basically the only "all-in-one" package software, and... it's free!
It's loaded to the brim with awesome features but it is definitely not noob friendly, so unless you have a background in Photoshop or GIMP, there is going to be some degree of learning curve here.
5. Adobe Photoshop CC
Price: $10+ per month/$120+ per year | Works on: Windows and MacOS

There are two quite heavily disputed champions leading the industry of digital artwork, those are Corel Painter and Adobe Photoshop. In my personal opinion the only one of the two that deserves to be called a champion of anything when it comes to digital art is Corel Painter, but nontheless I can't argue with the general consensus too much about photoshop's less disputed dominance over the market.
The best image editor, photomanipulation and post-processing software but with lackluster painting capabilities for it's price (it's brush engine while pretty nicely optimized, has too few customization options in my opinion).
Probably the most widely recommended digital painting capable software on the entire internet, used by professionals all around the world, personally I preferred Krita as while Photoshop's brush engine may be better optimized it's also less feature rich.
But photoshop has reigned supreme since the 90s for a reason, even if that reason may only be because it reigned supreme in the 90s, it is however the completely undisputed champion of photo editing and manipulation . and many photomanipulation and post-processing techniques that are often more easily achievable in photoshop than rivaling applications are indeed potentially useful for many of the more advanced digital artists, which is why a lot of artists end up working with 2 programs, i.e. their favorite painting application (commonly this is corel painter) and after finishing up there they copy the image to photoshop for post-processing and final refinement .
but there's no denying that this program is quite expensive in the long run. However there's also no denying that this is the most tried and tested program and most professionals by far use it, so you can't go wrong with this program as an intermediate-advanced digital artist, that's for sure.
6. Corel Painter
Price: Over $430 + $200 yearly for updates (Has Free Trial)| Works on: Windows and MacOS

The most expensive digital painting program there is, also quite possibly the best program ever for digital painting, with multiple super advanced brush engines, you can usually find a way to make the brushes behave exactly how you want in this program which is the key to any digital painter's ultimate success.
Is it just me or is that price so stuck in 2001 that no sane person that's not already a regular customer would EVER buy it in the modern market?
Even Adobe upgraded their pricing strategy, but here corel sits stuck with it's head up it's ass thinking it's still the only program in the world competing for the "professional digital painter" title, which given the large list of programs both above and below this line is obviously not the case Disbelief .
But there's a reason for this price because even if this may no longer be the case, ever since the freaking 90s up until the mid 2000s this was indeed the one and only program professional grade software targeting digital artists in the whole god damn world . the only digital painting program besides photoshop (and maybe the now pretty much dead GIMP) worth taking seriously.
But unlike photoshop they weren't having any of that "image manipulation" bullshit, no their goal was to create a real, lifelike painting experience in the digital space and they got pretty damn close, with probably the best collection of brush engines the world has ever seen . this digital painting software is an industry standard for a good damn reason.
this may very well be the best digital painter's software on the market, But Corel needs to get with the times or get lost in my opinion.
7. Clip Studio Paint
Works on: Windows and MacOS | Price: $50/$220

Simple and elegant, quite likely the best software for manga and comic book creation, and painting in simple/cel shaded styles.
Previously known as manga studio, this little gem woulda probably made my top beginner friendly software list if it wasn't for it's manga drawing specialization.This software is as I just implied quite simple and elegant at first glance, instead of having one main general purpose brush engine like most, it has 7 different brush engines for different brush types (from watercolor and airbrush to pencil and special effects) all in the same simplicity tier as SAI.
this oftware seems to be more strongly marketed in Japan is the only truly professional class manga illustration software, it does that job and it does it really, really, really well, so if that is your thing, this is quite possibly THE best software for you .
and as it is really simple, you can also happily use it as your first software. my main reason for not putting it up at the top are it's plethora of manga/comic book creation features, it's animation support, and confusing pricing strategy.
It is also all around quite feature rich compared to my first 3 recommended for beginner programs, but makes up for it by having a very elegant UI design making it a solid 5th place for most beginner friendly software. This program does everything it claims to do exceptionally well and is best for manga and comic book creation and works super well for cel-shaded (simple) drawing styles.
The clip studio paint EX version has some unique features including Animation, 2D to 3D conversion, multi-page management and multi-page files. It also costs like one kidney, but the pro version is quite affordable.
The Others
ArtRage (A program that like corel painter tries to emulate the feel of painting with rl brushes, omitted due to the imo slightly unreasonable asking price of $80).
Autodesk Sketchbook Pro (Costs $30 per year which is fairly affordable, I tried it but was ultimately unmipressed due to the programs complete lack of capability for working at high/custom resolutions. It is very simple, but as the name implies, it's decent as a sketching program and nothing more, I would have liked to expect more from a company like Autodesk. While some artists have managed to make quite impressive looking work in it, it seems ultimately unable to produce production quality work.).
GIMP (free, omitted because krita basically does everything GIMP does better than GIMP does it, Krita started out as a rework of the gimp but grew fast into it's own separate, and superior program).
Conclusion
And that's it for digital painting software may you test everything and choose wisely. If I forgot your favorite program make sure to tell me which one that is in the comments .

If you want to work with photoshop / Corel Painter etc. I'd recommend the XP-Pen Innovator 16 Best Drawing Tablet With Screen 15.6inch , however you will need a pc/laptop with good specs.
I just got the xp-pen drawing tablet monitor a few days ago. I can already tell I am going to love it! I kept going back and forth between getting it or not, but I am glad I finally decided to just invest in it.
In my opinion: Quick and easy to use. Like a digital sketchbook. You can draw on screen. The pen-pressure is awesome. You can draw in incredible details.
Both the XP-Pen Artist Pro Series and Innovator 16 are within my price range, and although I am not a professional artist and have no plans to make any money off my art, I'm concerned that I may feel that the XP-Pen Drawing Display is a downgrade.
And that's it for digital painting software may you test everything and choose wisely. If I forgot your favorite program make sure to tell me which one that is in the comments .
Hope that helps!

XP-PEN Star G430S Review: Affordable Graphics Tablet for Digital Writing and Drawing
Graphic tablets have become an essential tool among creative professionals and hobbyists alike, even more so now that working from home has become the norm for months—or years to come.
There is also no shortage of brands from cheap points of entry that offer satisfactory performance, to industry-grade staples like Wacom that everybody knows.
Wacom is a quality brand, but also at a price that for many is not viable, especially without having a very cheap entry range, with which new companies have been entering with cheaper alternatives.
From what I've read, XP-Pen is one of the leading makers of graphics tablet and that is why I chose to buy their Star G430S tablet.
This does not mean it's the best and it also doesn't mean that it's suitable for every task. It simply means that when we take into consideration price and features, this graphics tablet offers the best deal currently available.
This tablet is available on official store for $29.99 . So for around 30 bucks, you get a very good tablet that's very comparable to much more expensive tablets like the Wacom intuos.
Although this device is not necessarily innovative, the fact that it costs so little makes it an obvious choice for those who are still testing the waters before deciding on whether they should invest any money on a more expensive graphics tablet.
This is precisely why the Star G430S sells so much. The price is so incredibly low that anyone who buys it can rest assured that even if they don't love the product, they don't have much to love.
XP-Pen Star G430S Unboxing & Review : Small But Useful

I just bought the XP-Pen Star G430S recently. When I got I was amazed at the great packaging. I opened the box and unpacked all of the contents.
The XP-Pen G430S tablet comes with a USB cable, 10 pen nibs, one pen clip and a quick guide. Although XP-Pen pen nibs don't tend to wear out easily, it's great to have some extra ones.
Specifications :
Active area: 4 x 3 , inches
Pressure sensitivity: 8192 levels
Resolution : 5080 lpi
Multitouch : No
Reading Height: 10mm
Report Rate: 266 PPS
Supply Voltage: DC5V
Interface Support: USB
USB Cable Length: 1.5M
Compatibility: Windows 10/8/7 , Mac OS 10.10 above
XP-Pen Star G430S official site: https://www.xp-pen.com/product/52.html
Design

The drawing board has an all-black design. It's made of lightweight plastic , only 2mm thick.
This drawing pad is slim and compact. You can easily put it on your laps while painting, or use it on limited desk space, take it on a trip, etc.
The Star G430S tablet has no bezels, but not all the area is usable. The active area takes only 4 x 3 inches meaning that you will have to use zooming a lot.
This is most noticeable on higher resolution screens. If you have a high resolution screen it is quite difficult to avoid having a shaking hand because of how small the tablet drawing space is.
Due to the rather small size of the active drawing area, this tablet is known as a “signature device”, meaning that its main function is to allow the user to sign on the board and transfer the signature to the computer in order to use it with digital documents, mostly in PDF format.
In addition, this model does not have quick action keys, since the Deco mini4 / Deco Fun S ( both come with 4 x 3 inches active drawing area ) model will cost us a little more if we want three action buttons on our drawing tablet.
Stylus

XP-Pen Star G430S offers a magical pen that will eradicate all the difficulties while drawing on the tablet . and it's important to note that the digital pen is not battery powered at all . The pen does not require recharge, so it is always ready to go.
The pen that comes with the XP-Pen G430S tablet is pressure-sensitive, allowing you to make fine lines or bold strokes by varying how hard you press.
The pen provides a resolution of 5080 LPI and 8192 pressure levels that allows you to draw better on the tablet surface. Besides, the report rate of the pen is 266 RPS and is exceptionally lightweight to give you pleasure in whatever task you perform.
With this magical pen, you easily sign any documents, sketch like you sketching on a piece of paper, draw, write and a lot more.
There are two buttons on the pen which are essentially the same as right-click and middle-click on a mouse. You "left-click" by touching the surface of the tablet. And if you browse over the internet by using the digital pen, you can do so by just pressing the button of the pen.
Install and Setup

The setup was quick and easy; connect the tablet via the USB cable, install the drivers, and start having fun! Just line up your screen area with the tablet. I was easily found the driver on XP-Pen's website ( https://www.xp-pen.com ). The updated driver even had more features!
The options are minimal, such as changing the sensitivity, the functions of the pen buttons, choosing the screen on which we act, testing the pressure of the pen, and advanced settings, which allow us to change the area of the screen that we handle. with the tablet, the ratio and turn the actions if we are left-handed.
The tablet functions quite well. Not only that, but it was compatible with every OS (Windows ,Mac ) I tried it on. There is Linux ,Windows , and Mac OS driver offered for Star G430S on their official page.
The XP-Pen drivers will make it work with any drawing program. It compatible with a lot of programs like CorelDraw, Corel Painter, Adobe Illustrator, Adobe Photoshop, Paint tool SAI,Clip Studio Paint, Gimp,Krita, Inkscape, Zbrush , 3D Max, and a lot more. This cheap tablet ultimately helps you achieve your set goals and take the next move in the art world.
Use Experience
Fantastic tablet for osu!

This tablet is comfortable for osu , Really low latency using hovering or drag method. Software for the XP-Pen is not the best but it gets the job done.
This XP-Pen G430S OSU Graphics Drawing Tablet can both hover and drag , this is my personal opinion but I recommend you to drag ,it really give you a better aim ,at least in my case it did . you can't lift too high.
You'll get used to it fast especially if you were a high-sens mouse player (wrist-mainly), it's not like restarting osu! at all.
Of course you need to adapt from mouse to tablet but it's not that hard ,it only needs a few hours, and for me it made me instantly better ,like I destroyed all of my previous top scores the same day I got the tablet.
Overall love the product and they supplied so many extra pen tips. If you're using this for osu! it's definitely awesome and helped me jump from 4 stars to 5 star beatmaps!
Suitable for digital signature

Oh, and the tablet was good for creating a signature to use in adobe reader to sign documents. As far as a signing pad, it is fantastic. The small size makes it portable and it doesn't take up much room on my desk at all.
It works as advertised on Adobe Acrobat, Excel, MS Word and PowerPoint, though the pressure sensitivity is pretty much wasted on these things. For example, signing in Acrobat doesn't show any regard for pressure sensitivity. All the lines are equally as dark and thick no matter how you press.
Best writing solution for online teching

I use it when teaching online and it helps me illustrate concepts. I downloaded the microsoft whiteboard + onenote note taking app and my life is so much easier.
I use it to make my math videos mostly, but it has also been useful in drawing summary pictures for reading, underlining information in articles during video meets, and other things.
If you won't be using it for digital art, you are paying for features that you won't use or need.
Perfect for Photo Retouching & Editing

For working with photographs, the precision and ease of a pen beats a mouse any day. The pressure sensitivity allows me to alter the brush size or opacity just by pressing harder or lighter on the tablet as I draw.
Combined with the natural feel of the pen, this allows me to make photograph alterations involving hand-drawn layer masks and dodging/burning with ease. Actions that would have required multiple brush size changes, opacity changes, and tons of clicks of a mouse can literally be done in a single stroke with a tablet. I highly recommend getting a tablet if your mouse makes you frustrated while editing photographs.
Great for Graphic Design and Drawing

The XP-Pen Star G430S tablet is, of course, perfect for those doing graphic design and drawing. Also, the tablet is light and portable which may be important to students, outdoorsmen, artists, and those doing business presentations. It may also provide a great alternative input device for those with mobility issues.
The G430S is great for Illustrator and Photoshop. The sketch part works great. I can't believe how realistic it is. I couldn't believe I wasn't using a real pen.
Using the pen is just like writing with a pencil and paper. It feels very comfortable and very normal. The work surface is slightly textured so it feels much like pencil or pen on paper. The most unusual thing is that the pen movement is detected well before the pen touches the tablet. So you can actually control the movement before the pen and tablet touch.
In some cases, it makes you feel like you are using a magic wand. The response to the pen movements is quick and accurate. It even records levels of pressure sensitivity very accurately.
the hardware and software used in these devices were exactly the same being used in much more expensive drawing tablets, the only difference between them was the fact that the expensive ones had larger drawing areas. If you draw frequently, I suggest around a 10x6 inches for decent drawing space - XP-Pen Deco 01 V2 .
Good for 2D Animation

I found this tablet very useful when I use my 2d animaion software. It's good for touching up minor breaks in the lines so they can be filled easily and for painting them. Also for adding details that were lost by the scanner or adding simple background animation. In other words it's great for animators who can't afford the better ones. The mouse is pretty useless, I just use it as a paper weight but it doesn't hurt anything.
The mouse also comes in handy if you're using 3D programs like Maya (in which a mouse has benefits over a pen).
If you are going to need a tablet for a career in professional graphics/animation, I would recommend a professional model or display drawing tablets such as wacom cintiq or xp-pen artist , but would still recommend this product for travel/personal use.
Conclusion
Great XP-PEN product - a must have for artists and digital photographers to create/edit your work that's easy and fun.
As you can see from the information given in this XP-Pen Star G430S review, this model is simple but suitable for many types of work. You can use it for writing, signing, and working with documents, editing photos, drawing, sketching, and painting.
However, the drawing area is pretty small for some serious drawing projects. It seems like you are drawing on a small piece of paper. The unit is also extremely easy to install and is compatible with the most important programs.
Once I got the hang of using this tablet I was hooked. At first, finding where I was on the screen in relation to the tablet was a little difficult and frustrating. Given some time to practice and learn everything just fell into place.
When it comes to post processing this tablet really improves the speed and accuracy of processing and allows a true "feel" of the work. The whole process of editing seems more natural and the pressure sensitivity really adds a new dimension to the work.
I would definitely recommend the Star G430S to those who want to get a tablet and are just getting into the field of digital art or photo manipulation. Buy One!!!!!!!!!!!! They're Awesome! I sound like a sales person! YAY!
Buy Here:
You can Get it from United States official Store: https://www.storexppen.com/buy/star-g430s.html , If you live in other regions you can select from official site “Stores” List.

15 Best Free & Paid photo editors for beginners and professionals
Every moment in life is special, So we all want to capture those beautiful moments. “You not just click the moment we create a long-lasting memory”.
Either you are clicking the shot by mobile camera phone or a DSLR, everyone needs a few changes in look so, if you really care how your photos look, you need to import them into your PC to organize them and then go through all the click and select the best and perfect them with Photo Editing Software. Do changes for professional or personal use.
If you're a photographer looking for the best photo editing software for pc, you're not the only one.
After all, taking pictures is only half the battle – whether you're shooting on your phone or the latest mirrorless camera, we all need to edit our photos to make them look amazing.
In the right hands, the best photo editing software can take a dull image to something that can amaze your friends, or even win an award.
Editing software is essential for getting the most out of your image. Capturing the scene is only one step towards a perfect image. You'll want to tweak the exposure, contrast and/or other areas.
As a city photographer and architectural photographer, by post-processing, you'll be able to edit a number of exposures in parentheses, highlighting the sunshine or shade particulars you need as properly.
Commercial photographers select a formidable approach to vary the black and white layer into smooth gentle.
An artistic merged have a look at the picture is feasible by picture modifying. By altering the layer of curves to brightness, photographers have an effect on the distinction and saturation of the picture, for a greater mixing impact.
Almost all photographers shoot in RAW, however it can't be printed till it has been edited. By altering the color, lightening / darkening a picture, it may be printed.
With photo editing apps, photographers can change the distinction, coloration, hue, saturation, coloration, coloration, and extra. You can in truth take away the blur elements, undesirable objects from the scene; the shifting objects may be rectified to create an ideal click on.
Adobe products shine when it comes to editing photos. But, it's not the only credible photo editing software out there. In fact, there are plenty of photo editing software available on the market to explore and choose from.
Whether you need something simple for basic edits or you're someone that requires advanced features to edit your images like a pro, there's a free or paid photo editor for you.
This is our concise list of the 15 best photo editing software for photographers of all levels. We have done a full review of the photo apps & picked the top ones.
Each of these programs can perform the basic tasks of enhancing your photos to make them look amazing and some of these include advanced features similar to Photoshop that should satisfy your image creating and editing needs.
Top Photo Editing Software for PC and Mac from Beginners to Pro
1. Adobe Photoshop CC
Platforms: Windows,MacOS | Price: Paid

At the very top end of image editing is Photoshop, which has no real rival. It is one of the most popular photo editing software tools on the market. Photoshop is the primary tool for its legions of fans across the world, including designers, artists, and illustrators.
Its layering, masking and retouching tools still set the standard by which others are judged, while the power of its layer-based editing system can handle the most complex of creative projects.
Anyone who knows anything about photo editing and graphic design will have used one of the various Adobe Photoshop versions.
Photoshop offers similar tools to any other software in this realm, but to the nth degree – there are often several ways for performing the same function in Photoshop, be it changing a background colour, cloning elements, frequency separation, or any of the myriad other photo editing tasks.
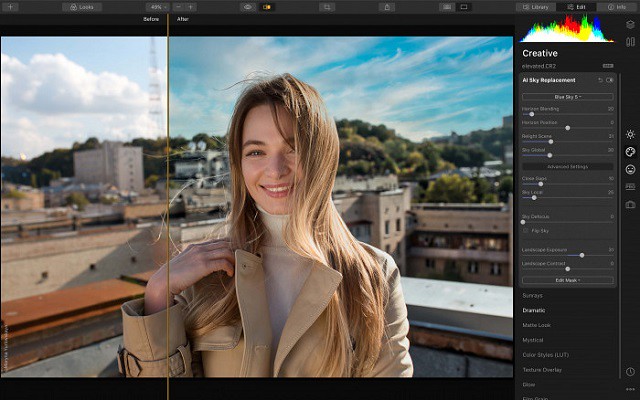
Then there are the special effects and healing tools that only Photoshop can accomplish – AI-assisted tools like content-aware scale and fill . Being able to recreate a scene that doesn't already digitally exist is a powerful feature for photographers .
This latest version increasingly relies on Sensei, Adobe's highly touted artificial intelligence engine, to facilitate a host of impressive features. The most high-profile of these include Sky Replacement, new Refine Edge selections. Plus, Neural Filters help simplify complex workflows.
Even though Photoshop can be difficult to master, it's not necessarily difficult to learn. It's pre-made workspaces, in-app tools descriptions and clear tools icons help make learning the program more manageable. Don't try to dive in all at once! A piece-by-piece approach to Photoshop will likely be the more successful route.
Adobe Photoshop CC is available only as a subscription service .For $10 per month, you get the Photography plan, which offers Photoshop, Lightroom and Lightroom CC for the desktop and 20GB of online storage. For $20 per month you get the same Photography Plan with 1TB of online storage.
If you're wondering why Adobe has two lots of photo-editing software on the market, it's because they do different things. Lightroom is mainly a RAW developer and photo organising tool, while Photoshop is the software that you will need for more complex adjustments, working on layers, masks and channels.
There are no image browsing or cataloguing tools in Photoshop itself, but since Lightroom is included in the same Photography Plans as Photoshop, that's not an issue. On its own, Photoshop is powerful but limited; with Adobe Lightroom it's half of the world's most popular image editing double-act.
2. Adobe Lightroom
Platforms: Windows,MacOS | Price: Paid

Adobe Lightroom is another powerful editing software by Adobe. Ideally, it is perfect for photographers who want a more straightforward yet capable tool to edit their images.
Lightroom is an all-in-one image cataloguing, raw-processing and editing program and the perfect partner for Photoshop. If your main work is photo enhancement rather than manipulation, you might not need Photoshop at all.
Unlike Photoshop's complicated and intimidating user interface, both Lightroom Classic and CC offer a more intuitive and user-friendly interface for image editing.
Some of its excellent features include: customizable sliders, gradient and brush adjustments, presets, blurring tools and other professional filters. Plus, you can use it with multiple devices and to help you keep your photos organized it uses face detection. All things considered, with this wide range of functional features and its easy-to-use interface, you can create just as remarkable photos with Lightroom.
Lightroom have a library of pre-made editing solutions called presets. These presets make it easier than ever to achieve a specific look in your photos. Simply find a preset package you like via Lightroom's preset marketplace or online, then apply it to one or more of your images for a flawless edit.
Of course, presets work wonderfully for batch editing your photos at a break-neck pace. And, you can even design your own custom presets. With Lightroom's presets, you have the opportunity to continually expand the software's editing capabilities.
Not to mention, many third-party plugins and applications have integrated with Lightroom to make using the program even easier. Envira Gallery, for example, includes Adobe Lightroom to WordPress integration that allows you to easily sync your Lightroom photo galleries with your photography website.
Another great thing about Adobe Lightroom, that many people praise it for, is the organizing capability it offers – you can add tags and sort your photos in your own style.
Unlike Photoshop, Lightroom is built to handle entire photo collections at once. You can import, sort, and edit your files all within the same simple interface.
Lightroom is the fact that it supports nearly all formats of RAW files, no matter the camera you're using, so this can be a factor to consider when choosing one of these tools.
Lightroom is one of the best photo editing software for pc that allows you to retouch full resolution images. This tool allows you to view, download, or add photos on the web. It offers a wide range of layouts.
3. Corel PaintShop Pro
Platforms: Windows | Price: Paid

Corel PaintShop Pro is a capable and one of the most inexpensive photo editing software tools out there. Some photographers call it an Adobe Photoshop alternative, but it lacks Photoshop's most advanced flagship features, including Camera Shake Reduction, 3D modeling, Faces Liquefy, detailed typography, among others.
Photographers who value simplicity will really like Corel PaintShop Pro . That being said, do not let its simple approach to photo editing fool you as it does not make its editing capability any less effective.
This software boasts everything you require to enhance your pics from AI enhanced presets to graphic design templates to options such as blur and fix. Plus, if the wide range of brushes, color palettes , textures and backgrounds do not float your boat, do not dismiss the software just yet as brand new features are being added continuously.
Now boasting numerous powerful AI-Powered tools that go well beyond free Photoshop alternatives, PsP has become a fully-featured graphics manipulation tool that provides excellent value for money.
In many ways, Corel PaintShop Pro is a powerful program, and It's easy for novices to grasp, and has some additional tools, such as 360-degree photo editing. It's also touch-screen compatible and has a new streamlined workspace. Corel has even made the tool icons large and distinct so that they're easy to select on a touch device.
You can preview, organise, and streamline your photo editing workflow in the Manage workspace, which also allows you to add keyword tags to your photos, create catalogues, make batch edits to multiple images at once, and review metadata and file information.
If you need to extend its capabilities, Paintshop Pro supports various 64-bit plugins from Adobe, Topaz Labs, Nik Collection by DXO and many more. You can even import and export PSD files to work across platforms.
PaintShop Pro is a fantastic option that represents a unique amalgamation of Lightroom and Photoshop in one. Like some other software, it requires a one-time fee, which starts at around $60 to get a life-time license. For that price, you gain access to dozens of textures, backgrounds, and brushes to choose from. And, app updates add new features all the time.
This software is comprehensive and powerful enough to help you with any tasks, but remember the fact that you'll have to pay for most of the features offered. They have multiple payment plans, and with those come more and more options you can use – so this can be a little tricky. Other than that, there's only one more thing that can be a major drawback for some: it is only Windows supported. Think it through before making a choice.
4. Affinity Photo
Platforms: Windows,MacOS | Price: Paid

If you're looking for a pro photo editor like Photoshop, Affinity Photo is an excellent choice. Affinity Photo is sold at a budget price point, but it has the tools and the features and the power to compete with Photoshop head-on.
Serif has focused particularly heavily on the retouching market, with cloning, healing and retouching tools, an Inpainting tool for automatic object removal and a dedicated Liquify persona (workspace) for localized image distortion effects.
That being said, Affinity Photo's primary focus is photography, so it lacks a few of Photoshop's extra features (like 3D editing).
Other than this, Affinity Pro's main difference with Photoshop is how the tools are organised. It uses “personas” instead of workspaces and that might take a little getting used to for folks used to Photoshop.
It comes with layers, masks, smart objects, colour management, and both CMYK and RGB editing, as well as decent Raw file conversion. its filter effects can be applied ‘live' and its HDR tone mapping and workspace tools are excellent.
From focus stacking and panorama stitching to HDR merging and digital painting, it has just about everything you could want in a photo editor.
Like Photoshop, though, it's focused solely on in-depth, technical image manipulation. It doesn't have its own browsing and cataloguing tools and it doesn't do instant preset effects. Affinity Photo will bring the tools, but you have to bring the vision.
For just $50—or cheaper if there's a sale—Affinity gives users a surprisingly complete set of Photoshop-like features. but subscription-free, via a single extra-low payment.
As far as the learning curve is concerned, much like Photoshop, the tools in Affinity Photo are quite in-depth and will take some time to explore and learn. Luckily the interface is quite logical, and if you've used Photoshop before the tools will make sense.
5. Capture One Pro
Platforms: Windows,MacOS | Price: Paid

Capture One is a RAW image editor made by the camera company, Phase One. If you are a photographer who is mostly interested in enhancing RAW images, then this is a better option than Adobe Lightroom.
Capture One works both as tethered capture and editing tool for studio photographers with a 'sessions' based workflow and as a Lightroom-style image cataloguing, searching and non-destructive editing tool. It works in a single window rather than in Lightroom-style ‘modules' and has a highly customizable set of ‘tool tabs'.
One of the key differences is its layers-based local adjustment system which makes it much easier to see and edit your changes to your work, and this now includes 'parametric' linear and radial gradient masks which you can edit later. Capture One's conversions look smoother and sharper than Lightroom's.
Its raw conversions are sharper and less noisy than Adobe's, but it doesn't support such a wide range of camera raw formats or as large a number of lens correction profiles. It doesn't have Adobe's mobile apps and online synchronization options either, but it does offer professional-grade ‘tethering' tools for studio photographers capturing images via a computer.
Capture One Pro also has a better system for applying local adjustments, using adjustment layers and masks. It's expensive, but very, very good.
This RAW image editor boasts some features that set it apart from the other software solutions available. For starters, if you need to work with big volumes of photos that are more than 20 megapixel RAW files, you will be impressed with its speed. What is more, to help you work more efficiently, the interface boasts some great customizability which means that you can change the keyboard shortcuts and layout to suit your preferences better.
If you often work with layers, you will also love the fact that it does not become slower when you have too many layers. Plus, it lets you make several adjustments per layer.
Some of its other fabulous features that will help you to work more efficiently are its sophisticated color editing and annotations. Its sliders make it much easier to tweak the granularity, while the annotations feature lets you jot down ideas to ensure that you can collaborate smoothly with other photographers and designers.
You do need a relatively powerful computer to run Capture One Pro smoothly. The only real strikes against it are the fact that there's no HDR or panorama options, the steep learning curve, limited plugin support compared to other software, and the price.
The full-fledged version retails at close to $300. There's also a subscription option at $20/month ($15/month if you prepay for a year) – considerably more expensive than Adobe's Creative Cloud Photography Plans.
6. Gimp
Platforms: Windows,MacOS, Linux | Price: Free

GIMP is a free, open-source photo editing software that's easy to download and install on your computer. It has multiple features which help you with retouching photos, photo composition and picture enhancement. It also includes a built-in file manager.
If you're a photographer, graphic designer or illustrator with a limited budget, GIMP offers many powerful features that with other software you'd have to pay to use.
The user-interface takes some getting used to and isn't as refined as Photoshop, but as with any editing software, once you're familiar with it, movements become second nature.
Once you launch the program, you'll find a dedicated window that displays the image. You'll also see two floating docks: One with the toolbox and another for managing layers, paths, brushes, and more.
It's also completely customisable, with dialogues allowed to float anywhere on the screen. You can customize not only the tools available, but also your workspace's color, widgets and widget spacings.
All the essential image editing tools are there: noise reduction, cropping, colour adjustment, gradients, brushes, curves and image enhancements.
For blemishes, there is the clone stamp, healing tools and you can even apply changes to isolated areas.
When using a large display, or two monitors, you'll have an expansive workspace to edit your images. Icons in the toolbox represent specific tools, like Scale, Pencil, Paintbrush, Bucket Fill, Airbrush, Smudge, and more. You can apply numerous filters, too, such as dropping a shadow, adding a neon effect, adding a glass tile, removing devilish red eyes, and so on.
It can handle all the usual file types, including RAW, JPEG, TIFF, PSD, GIF and more.
Because GIMP is open-source, there's a very active community of users who have created plugins to add even more functionality to the program. However, despite a more user-friendly interface than past versions, Gimp offers almost nothing in the way of guidance, which makes it much more difficult to learn than other photo-editing software.
This free professional software for editing photos is another excellent Photoshop alternative for beginners. It boasts a variety of features that can assist novices with digital photo retouching and composition. With the help of features like vignette and corrective mode, you can also take your photos of any file format to the next level.
Gimp is good for starters and professionals with limited requirements. However, it is not an ideal option for pro-level editing work.
7. Paint.Net
Platforms: Windows | Price: Free

Paint.Net is an easy and convenient image editor with a clear and well-ordered interface. It offers you tons of Layers and filters, Plugin support but when compared with the GIMP, It is less powerful than GIMP.
With Paint.Net you can make some basic editing without deep changes and professional retouch. The software will come in handy for Social media marketing Specialists and Photography lovers who need to put pictures in order fast.
Paint.Net has a similar Adobe Photoshop interface. Tools like a magnifier, crop frame, color picker, and brushes are placed on the bar on the left side, history of editing and layers to work on - on the right side in different windows. All image editing functions are available in the Adjustments menu, including tools of Hue / Saturation and Curves.
These tools are usually used by professional photographers and photo retouchers. In this program, you can overlay layers, mix them, for this you need to choose a "Layers" palette tool. You can return to any stage of photo editing.
The name doesn't sound all that fancy. Although it sounds like Microsoft Paint, it is a dedicated photo editor. Albeit a basic one. It is easy for beginners as it has layers, unlimited history, and special effects.
Editing with Paint.Net is very fast and easy, even on older systems, despite the fact that it lacks some advanced tools. It is free, but unfortunately for Mac users, it is exclusive to Windows.
Sometimes it is important to work with a YouTube photo editor that does not include very many complex features. While going with this software, You see it's a quick, easy to work with and help you to create new look images.
8. Photofiltre Studio
Platforms: Windows | Price: Free and Paid
Photofiltre is not a widely known photo retouching program which won't cost you a penny, but it has plenty of features that casual photo editors will find useful.
As its name suggests, PhotoFiltre offers plenty of terrific filters and tools for enhancing images. There are filters for adjusting brightness, contrast, increasing and decreasing saturation as well as sharpening or blurring images.
It has a host of artistic filters, too, including textures, watercolor, pastels, sepia tone, black and white, night and sunlight effects and emboss. It even has a puzzle effect.
The program doesn't offer layers, though it does allow you to put text over an image. Many don't use layers anyway so, for them, the lack of this feature is no loss.
Whatever filter you apply it can be undone. It also can be faded. So if the original effect is too strong, you can reduce the amount via the Edit menu.
PhotoFiltre includes an Image Explorer, which is accessed through the Tools menu. Open any image folder on your hard drive and its contents are shown along the bottom of the window. Simply double click on a photo to open it and begin editing.
You can do automated batch processing of any number of photos. Select the Source and Output folders and file format such as JPEG, GIF and TIFF. Next select the image size and if you want a frame automatically added to the images. The size and color of the frame can be adjusted.
During the batch process, brightness, contrast, saturation and Gamma correcting can be applied to photos. You can apply a few filters such a sharpening and scanlines, and rotate or flip images. The batch process is fast and easy. Since not all photos need the same amount of processing, do a test run to see if the results are to your liking.
An advanced version of PhotoFiltre , called PhotoFiltre Studio, is also available for a nominal fee. Unlike the free version, PhotoFiltre Studio has layering capabilities. It is shareware and can be tried for a 30-day period.
9. PhotoScape X
Platforms: Windows, MacOS | Price: Free and Paid

Photoscape X is an incredible photo software editing program that people from all around the world can use; it's compatible in a number of different languages.
Using Photoscape is ‘easy and fun'. it allows you to easily edit photographs taken from their digital cameras or even mobile phones.
Although the Photoscape editor does not have a lot of advanced editing tools, the app is best used as a quick editor. It contains essential tools that allow you to apply filters, frame, crop, add text, draw, clone and so on.
Photoscape is stuffed with a lot of features while retaining its ease of use. It has just about any tool you might be looking for – white-balance correction, color correction, brightness and contrast, etc.
The app's features include a raw converter, file renamer, batch processor, viewer, color picker, screen capture tool, and print layout tool.
It even has a GIF animation, and will convert your RAW images to JPG. You can also customize your toolbar into the features you use most, combine and split images, and make slideshows.
Original photos can be edited using the one and only Magic Color with Photoscape X. Plus, over 240 features and over 1,000 patterns are easily accessible. It also boasts some really cool Instagram-like filters, frames and vintaging options.
The only real downside to Photoscape is that it runs ads for other “recommended” software – the price you pay for “free.”
PhotoScape is one of my favorite tools for post-processing, mostly because it has a friendly UI and quick editing features. It is one of the better free photo editors out there, and it's well worth checking out.
10. Darktable
Platforms: Windows, MacOS , Linux | Price: Free and Paid

Darktable is an open-source photo-editing application that allows you to enhance raw images. It also happens to be one of the only free image editors that doubles as a space to store and organize your photos. This app enables you to automate repetitive tasks. It also allows you to manage color with no hassle.
You can add tags to images, rate them, organize them into folders, and mark them by color. It also allows you to create and save your own presets, making one-click editing a breeze.
The interface is almost identical to Lightroom's, with the ability to quickly toggle between your photo library and editing tools. The main photo editing workspace is clear and straightforward, with a well-designed and friendly interface for something that doesn't command a price.
You view your files in the ‘lighttable' tab, with editing taking place in the ‘darkroom'. Under ‘other', you have map, print, slideshow and tethering modules, all of which load near-instantly.
There are some very powerful tools to be found. For example, lens and perspective corrections come as standard. also, there are surprising additions such as tethered shooting, selective colour correction, snapshots, multiple moveable masking options, and a completely customisable workspace. You can even add third-party modules.
You are not restricted to jpgs, as Raw files are easily and automatically converted. Darktable also offers non-destructive editing, allowing you to convert back to your original image quickly and easily.
DarkTable tends to fall short in accurate camera profile matching. Still, contributors do a great job in offering support for new cameras and lenses – the automatic lens correction is particularly impressive, and rivals any paid software.
There aren't enough tools for professional photographers, and Darktable can get buggy and crash if files are too large. While the tools offered are similar to those in Lightroom, it does fall short in its ability to handle professional color manipulation.
Although it doesn't offer all of the advanced tools of Photoshop, it does a great job as a free Lightroom alternative. It's a good starting point for beginners. There are no adverts or annoying, locked premium features.
Online Photo Editors List
From adjusting just the basic brightening of the image to the more complex adjustments like taking wrinkles and lines off of our faces and correcting our smiles and our bodies.
We live in a fast paced world of social media today and are in constant need of finding ways to edit our images. It's always convenient if we can find something that is online so we don't really need to download too many apps on our systems.
I have put together a list of web based editors that are easy to use and will help you get your basic image adjustments done to perfection.
11. Pixlr
Platforms: Web browser-based | Price: Free and Paid

Pixlr is a free photo editor that's 100% online. This is great for people who are wary of downloading free programs onto their computers. This works with HTML 5 rather than flash, so no unnecessary downloads on your end. I chose this editor because it works seamlessly with machines that do not have a lot of space (example: Chromebooks).
Pixlr offers a Chrome App that connects to Google Drive. No account is necessary to use Pixlr; you only need to create one if you want to use the Pixlr Library with free cloud storage.
The crowded toolbar reminds us of Photoshop. This photo editing tool includes most of the common photo editing tools such as: magnifying glass, lasso, dropper, pencil and paint brush. It also features a red eye removal tool and a color palette which you can use to fix the color of your image. To add more versatility, you can work with layers.
With the retro vintage editor, you get access to three settings. Each of the settings has a side scrolling list of effects you can use to customize your image. However, whether you use the vintage or basic photo editing tool, you can come up with a high-quality image.
With it, you can create clean canvases, on which you add your photograph. I was impressed by the number of tools that this photo editing software has to offer, everything from standard options, to unique effects and layering features.
A handful of filters such as HDR, glamour glow, and vignetting offer quick and easy ways to improve your photographs. With this photo editor, you can make finely detailed changes to colors, saturation, and vignette effects. On top of these, sharpening and blurring your images is a breeze.
When you go to Pixlr's website, you can choose to use Pixlr Editor or Pixlr Express. Pixlr Editor enhance your image with Free Photo Editing Software features that are similar to Photoshop like cropping, resizing, and changing the colour of the entire image. while Pixlr Express suited for applying filters, texts, and other overlays effects to a photo. The desired Extension can be applied to save your edited image as JPG, PNG, BMP, TIFF, and PXD (layered Pixlr image).
Pixlr offers a free version. However, it is cluttered with ads, which is a major distraction for any photo editing professional. Pixlr is right now offering substantial discounts on its pro subscription plans. You can get a monthly subscription at $5 and quarterly at $12.
12. Photopea
Platforms: Web browser-based | Price: Free and Paid

Like Pixlr, Photopea is a photo editing program that works completely online. This means you won't need to worry about downloading any software onto your computer.
Photopea supports numerous file formats, including PSD, XCF, CDR, etc. making it great for photographers, graphic designers, and graphic artists.
This one could win the hearts of many, as it is internet-based and completely free. If you give Photopea a try, you'll see that it is super similar to Photoshop in many ways.
Of course, Photopea doesn't provide all the functions that are present in Adobe software. But its feature set is extensive enough to satisfy users, especially those, who aren't willing to spend much on the subscription.
The Photopea offers a wide variety of image editing tools, including advanced features like spot healing, a clone stamp healing brush, and a patch tool. The software supports layers, masks, smart objects, layer styles, filters, vector shapes and masks, and more. A full rundown of Photopea's tools is available on the app's website, as well as tutorials for select basic activities.
Unlike Pixlr, Photopea doesn't offer an image library. If you close your browser without saving, you'll lose your work.
It is one of the best photo editing app for PC that works for both vectors as well as raster graphics. It is equally suitable for complicated procedures like web-page design, making illustrations, editing pictures and simpler ones like changing the size of pictures.
Photopea is free, but in exchange you'll notice a lot of ads around the interface. If these are too distracting, you'll need to pay $9 a month to get rid of them. At this price, you could nearly be paying for an Adobe subscription.
13. Fotor
Platforms: Web browser-based | Price: Free and Paid

If you're looking for a tool that simplifies the photo-editing process, then you will definitely love Fotor. This application can be used with no knowledge. It allows you to drag and drop images. It's one of the simplest tools that you could ever use that doesn't forfeit in terms of editing options.
Do you want to tweak your color balance, brighten the image or simply crop your composition? With Fotor it's easy-peezy. A few other editing options include the possibility to add borders, frames or effects such as scratchy pencil or the look of paper.
some of its main features include: design templates, filters, HDR effects, and portrait retouching. Alternatively, if you are looking to create a bit more informal design, there are countless shapes, fonts and stickers that you can play around with.
This online photo editor and collage maker also comes in a full-fledged desktop application. Moreover, it supports RAW photo conversion, which is a valuable feature for free software.
The software also comes loaded with image enhancing tools, including numerous filters to create stunning images. Its user interface is quite simple to use and offers stunning one-click filters, which can enhance your images instantly.
In case you don't like the software's interface, you can simply customize it and swap things around by changing the theme.
The cloud-based software allows you to save the incomplete designs for future editing. That way, you can start from where you left the work. All you need to do is upload your images onto the website and you can start editing, creating designs and more.
For the free photo editor, you are limited to working with 4000px images. This resolution is something most enthusiast or hobby photographers won't have a problem with but can become a hindrance to larger images.
This well-known cloud-based software boasts more than 300 million users already. Fotor is the ideal tool for photographers who don't have a lot of experience with post-processing, or who want to preserve the original quality of their digital imagery. But it will not satisfy you if looking for professional photo editing or adjustments.
14. Befunky
Platforms: Web browser-based | Price: Free and Paid

Befunky is very good online photo editor with lots of stunning picture editing options. It's used for making basic photo enhancement and color correction, create collage and graphic design. This app enables you to crop and resize photos with ease.
There are 10 modules for image editing, which are organized in the form of a side panel. I like that you can create layouts of your works, import images, customize them as you wish, and then change the layout without overloading the pictures.
It works especially great with collages. Create a simple collage is very easy. There are hundreds of great photo collage templates, but the problem is that most them are closed for free use.
If you have a specific area that needs retouching, the tool has a variety of options for taking your image to the next level. It's simple, easy to use, and performs well in your web browser.
BeFunky also has another cool feature, called Graphic Designer, which allows you to create brochures, posters, social media posts, and even your own templates, right in the app. While it may lack certain professional features, such as editing layers, can't open RAW pictures. you won't find a more efficient option for getting high-quality, creative images in little time.
The best feature, though, is the AI image enhance button that does a pretty good job for you in just one click.
However, most of the features are chargeable, so you will have to spend some amount of money to use all of them. But you will be able to do the basic editing of the image, with features like crop, resize, rotate, exposure, beautify, smoothening and blur, free of cost.
This is a great option for beginners, but for more advanced users, the functionality and capabilities won't be enough. Moreover, the free version of the image editor comes with more than 30% of limited tools and constant intrusive advertising. I would choose this software if I could access art effects free of charge, since they are fantastic.
15. Canva
Platforms: Web browser-based | Price: Free and Paid

Canva is a free photo editor that runs in your browser and is perfect for turning your images into other business assets like social media posts, brochures, presentations, and more.
This online design tool offers a ton of powerful editing features, including a drag-and-drop design tool and millions of stock photos, vectors, and illustrations.
You won't find advanced tools here. For clone brushes and smart selectors, you'll need to look elsewhere. But, you will find sliders covering an array of adjustments.
With Canva, you can easily edit photos using preset filters or get advanced tools like tints, vignette effects, sharpening, brightness adjusting, saturation and contrast, and more.
I was amazed at how easy it was. You can edit right from the browser! Upload your image, play around with the filters, and download your photo. It's really that easy.
Whether you simply want to crop or straighten a photo or want to get creative with textures, fonts, badges and stickers, Canva can help. Some of its other features include vignette, photo blur, a speech bubble maker, an image transparency tool, photo frames and design grids.
Though, if you do not know where to start, be sure to visit the Canva Marketplace where you can find more than 8000 templates. Its basic features are available free of charge, but the more advanced features must be paid for. If you need to edit on the go, you will be happy to know that you can download it to your smartphone.
If you want to build a consistent presence around your entire business—from product photos to marketing assets—Canva's got you covered.
This web browser free editor software is a perfect place for changing your images into gifts, either for yourself or family and friends. Cards, posters, and invitations are easily created if you don't opt for social media stylings.
There are upgradable options other than free software. Canva for work comes in $12.95 and gives you access to thousands of stock images and unlimited storage. All of which is handy for your business.
Do I need a graphics tablet for photo editing

When I first started editing photos in Photoshop, I used a mouse on my desktop and laptop for everything, from drawing complex masks to painting contrast into the sky. It worked, but it was difficult to do accurately and caused a whole load of hassle. It took me some time to make the leap and go from using a mouse to using a art tablet for photo editing, but once I switched to a Photoshop tablet, I have never looked back.
My first run-in with a pen and tablet for Photoshop was in 2018 with a XP-Pen Star G640 Tablet. I can still remember getting it. It felt awesome to use but was also very difficult to get used to. At first, I used it for everything because, well, I could! After a while, I realized the pen and tablet are just tools for post-production and it doesn't need to be used for everything. There are two main tasks I use my pen for while I edit.
Before I discuss what I use them for, let's take a look at why I use them.
The pen and tablet is kind of like a mouse with one very special characteristic that makes it stand out, pressure sensitivity. When you are using a brush in Photoshop with a mouse what you click is what you get. What I mean is, whatever brush presets you have set, the brush will respond with. Sometimes that means you will get a harsh line and the only way to make it less abrasive is to lower the opacity. However, you can only have one opacity set at a time, right?
Wit a pen and tablet things are a little different. A Pen and Tablet will use your hand's pressure on the tablet to respond with the appropriate opacity, flow, or size. So, the softer you brush with your pen, the smaller or lighter the stroke will be. The harder you press, the darker or larger the line will be.
As you can see in the photo above, with the mouse, what you click is what you get. With the Pen and Tablet, you have a lot more versatility and all with the delicate stroke of the pen on the tablet. This give you a ton of control when you are editing your images.
I primarily use the pen and tablet for two things in Photoshop, Masking and Dodging & Burning.
You may have heard of a pen and tablet before. The term Wacom is almost synonymous with the pen and tablet. However, other brands such as XP-Pen also offer a wide range of options with an equally wide range of features. Where they differ significantly is price. xp-pen tablet is about at around a third of that of the same wacom model.
The entry level XP-Pen Star G640 has only 6 by 4 inches of the active working area , but this will still be sufficient for most home users and those starting out with their photo editing, making the Star G640 the best beginner drawing tablet. I would recommend the small size as sufficient for most users, although there exists of all sizes from A7 to A3.
When looking for the best pen pad for Photoshop, you need to make a personal decision on whether you want a drawing tablet with a screen or not. You definitely don't need a graphics tablet with a screen, but they can improve the accuracy of your Photoshop work, depending on your technique. If you do want one, you will be looking at a significantly increased cost, although it is possible to get a relatively cheap drawing tablet with screen, such as the XP-Pen Artist 12 Pro , if you are more budget limited.
The XP-Pen Artist 12 Pro is an excellent budget drawing tablet with screen. Technically, the pen pressure and accuracy are on a par with Wacom, although in real-world practice the Wacom tablets come out on top. There are many more models in the XP-Pen Artist series if you have more to spend and are looking for a larger screen.
Conclusion
There are many photo editing software's on the web ,depend on what type of photo editing you usually do. Whether you are a professional or beginner, you can use any of these photo editing tools.
Choose the tool that not only appeals the most to you but is also very easy to use and enables you to achieve desirable results.
Now that you have a good understanding of the top paid and free photo editors out there, it's time to get testing! If you don't want to spend money on a photo editor, start with a free one or a free trial, then take it from there.
Not all software is meant for everybody. For example, Adobe Photoshop needs months/years of practice to become an expert.
However, other software like Canva, Fotor, etc. are browser-based, and they need you to be familiar with their layout. Of course, you needn't be a design expert to get going with any of these.
We hope this article will help you pick the best photo editing app for your computer. Check the pros and cons and go to the official website to download the chosen software!
this article was just my opinion. You should try them out and judge for yourself. Hard work pays off and results will come in no time! Happy Editing!
Leave any questions or suggestions below !

12 Best Free & Paid Digital Art Drawing Painting Software for Beginner Artists

Digital Painting, immensely flourishing, is an art process of painting or creating artwork digitally. Digital Painting plays an important role in today's world. Everything has been digitalized and we are to expandingly grow more on the journey of digitalization. Digital painting has brought many advantages to itself in the art. It gives the artist freedom of action.
Digital art is making a vast place and too many companies are introducing very well featured software. With the help of the best editing software, anyone can create a comic, graphic, illustration, and painting easily. Whether the user is a beginner or professional, anyone can create a masterpiece according to the imagination.
To bring imagination into the real world you have to find excellent Digital Painting software. With the help of the best painting and editing software, you can create anything that you want with a fine quality feature. So, let's go through where to find the right digital painting software?
There is many software with similar features and capabilities. So, it became hard finding out the best one. So, we show you the 12 best free and paid drawing software.
Check out the list o the below-mentioned editing software and choose one for creating a digital painting, comic character, illustration, etc.
List of best digital painting & drawing software
When you create a catchy image that it will help you to increase the number of your viewers. To create an excellent one is a big responsibility of the creator. OR to create a masterpiece master software is required. So with the help of the list of best digital painting software, you can create a mesmerizing image with beautiful effects.
The below mentioned are the good features and easy-to-manage software that you can use at a reasonable cost.
1. Adobe Photoshop
Platform: Windows, Mac OS | Price: $9.99/month
When you talk about editing the first name click in your mind is Photoshop. This one is the most popular painting and image editing software. With the help of this software, a beginner can easily editing images. Now it brings lots of creating features, brushes, shapes, etc to create a digital painting.
The newest version of Photoshop comes with a bevy of advanced features, including a "Paint Symmetry" mode that lets you create intricate patterns (e.g. Mandalas) on custom axes of symmetry while a content-aware fill workspace provides an interactive editing experience. Other goodies include a frame tool for easy masking, multiple undo levels, and live blend mode preview.
Digital artists like Photoshop's custom brushes and often create their own. Detailed layer settings, regular updates, and a sleek user interface are the driving force behind Photoshop's continued popularity.
You can rotate your canvas naturally to mimic the rotation of paper. And you can setup grids and rulers for complex scenes, or even bring in 3D objects to paint over. PSD files(Photoshop's native file format) play well with other Adobe programs and this file type is an industry standard.
That means you can import PSDs into almost any other art software without a hitch. GIMP and Krita both accept PSD files along with many other programs.
This is why many artists combine Photoshop with other painting software. Depending on the workflow you're going for you could do your concept and lineart in something like Clip Studio Paint, then bring it to Photoshop for coloring and final touch-ups.
Other digital art software doesn't try to replace Photoshop but instead tries to improve on the interface for specific types of art(ex: comics, storyboards, environment paintings, etc).
It is a bit costly as compared to the other programs. The software work in windows and Mac OS. you can share data and access multiple assets because it is a part of Adobe Creative Cloud.
2. Clip Studio Paint
Platform: Windows, Mac OS , Android , iOS | Price: $49.99

Clip Studio Paint is the most popular software for creating comics and manga artwork. CSP was originally named Manga Studio but changed names in 2013. It originated in Japan as specialist software for manga, illustration, and animators.
The most notable drawing difference between Clip Studio Paint and Photoshop is the brush tool. In Clip Studio the brush tool instantly corrects any minor wobble you make while drawing on a tablet, leaving you with smooth clean linework.
Trusted by professional comic book artists and manga illustrators around the world, the powerhouse digital art software boasts a truckload of specialized features. Clip Studio is optimized for comic book creation and has various tools to speed up the process.
These include panel tools, customizable speech balloons, effect lines, and rulers to draw a variety of lines and shapes. You can also add perspective and realistic depth to backgrounds, position 3D figures (with adjustable body shapes and camera angles) directly on the canvas, and do a lot more.
The program makes it simple to draw vector shapes in smooth strokes and even comes with a "vector eraser" tool to easily erase intersecting lines. Clip Studio Paint gives you access to thousands of customizable brushes, as well as "effect lines," that can be used to add dramatic effects (e.g. speed, action) to illustrations.
Managing the storyboarding workflow is a breeze too, thanks to the page manager and story editor features. Once complete, the finished manga/comic can be previewed in 3D and even published directly in popular formats such as EPUB.
Clip Studio Paint uses advanced pen pressure detection for natural, realistic-looking pen strokes. The collection of its brushes is very fine and gives you a fine touch in a single stroke. If you are looking for a traditional painting experience while doing a software painting then this one is the best choice.
CSP is very good for lineart, It is not the best software to colored in my opinion, but if you're into creating colorful drawings, you could use it to create line art, then export that to Photoshop & other art software & color them there.
It offers its services in two versions:- Pro & EX. The pro version is affordable. If you choose this then you can only manage a single page at a time and fewer features as compared to the EX. ButWith the help of the EX version, you can easily manage multiple pages simultaneously. It offers you an amazing combo of 3D art painting, illustration, etc.
3. Corel Painter
Platform: Windows, Mac OS | Price: $429.99

Corel's graphics processing programmes are known to be one of the leading companies and Painter's new publication is no different. It is the ultimate digital art software for Windows with the right balance of output and functionality.
The extensive collection of over 900 pinions by Corel Painter is divided into 36 categories, from dab stencils and pattern plums to mixers and texture pins. You can also upload brushes and even make your version from other creators. You can either easily turn an image into a digital painting with Corel Painter's informative guides, or paint the lens with a picture as a replication source.
The program comes with six new color harmonies that can be saved as sets, making color selection an effortless affair. It also uses guides and grids based on classical image composition techniques, allowing you to create digital artworks that have a unique sense of proportion. Using mirror painting and kaleidoscope tools, you can easily design symmetrical illustrations by reproducing brushstrokes on the opposite sides of the canvas and by having multiple reflections of mirror planes.
Corel Painter's latest version brings plenty of new enhancements and improvements, particularly for Apple users. There's Sidecar support on macOS Catalina, enabling you to mirror your Mac screen on your iPad and paint with your Apple Pencil, and for MacBook Pro users there's Touch Bar and multi-touch trackpad support.
Other new features include AI-based art styles with 12 artistic styles to choose from, a thick paint workflow for achieving gorgeous oil looks, clone tinting and enhanced layer control as well as plenty of performance optimisations.
This program is very good at imitating traditional brushes, you could use it to paint as if you are using traditional brushes & canvas. It is one of the most expensive ones in the list, but it is surely worth trying. The software is suited or a range of styles. The software is suited to create photo art, fine art, manga, concept art, and illustration.
4. Paint Tool SAI
Platform: Windows | Price: $50.81

Paint Tool SAI is a simple painting program that's exceptionally popular among anime & manga artists. it contains many tools that makes drawing & painting easy, and it is relatively easy to learn.
Paint Tool SAI was first released in 2008 to a wave of popularity. It quickly spread among the art community who loved the clean brush strokes and unique interface.
Ideal for illustrations especially cartoons and anime, it has a straight forward interface, easy to use tools, and offers digital support to devices such as tablets and mobiles. A big plus here is the color tools including full-spectrum choices (light and darks) and luminescence.
SAI's learning curve is minimal and if you're coming from Photoshop you'll pick it up almost instantly. It's still very detailed though and great to use as a sketching program.
Use the pencil brush to get realistic sketches down on a textured canvas. Then switch over to brushes and color your line art to completion.
Now there are some minor limitations like that new projects are limited to 256 layers per canvas. It's also known to slow down with larger file sizes and glitch when trying to preview .gifs in the explorer window.
They also have a system of brushes where you can import textures to merge with brush styles and create totally new brushes.
Many artists use SAI to achieve a digital watercolor effect where the blending modes can mimic watercolor, but the overall feel is smooth and sleek. Others use it primarily for lineart, or for creating a ton of anime.
SAI is a small, old program and has not been significantly updated over the years. It only runs on windows and has a limited set of features.
Now there are some minor limitations like that new projects are limited to 256 layers per canvas. It's also known to slow down with larger file sizes and glitch when trying to preview .gifs in the explorer window.
Get started using SAI by following some easy beginner tutorials on painting in the program. If you put in the time you'll be a pro within a few weeks.
A fantastic program for anyone serious about anime-style art or any kind of digital painting. I'd say SAI is an awesome choice for anime lovers the world over.
5. Artrage
Platform: Windows, Mac OS , iOS , Android | Price: $79 ( for pc )
ArtRage is an easy to use art software for digital painting, and could be used to imitate traditional brushes with its lovely coloring abilities.
Unlike other digital art programs, ArtRage has stepped away from the complicated user interface and ditched the blocky side panels. They want your focus on the canvas creating great work.
when you start drawing on the canvas. The UI automatically disappears(although this setting is optional) and without the UI you get a full screen canvas to work on without any distractions. Pretty cool!
If you are coming from Photoshop you'll find the minimalist layout refreshing and easy to pick up. The brush presets are so good that you don't need to waste time adjusting them much at all.
It comes with a wide variety of unique toolkits which simulate their real collaborators. You can paint using thick oils, delicate watercolours, and even interact with patterns by mixing and spraying the paint. You can design and draw just as you'd on paper thanks to a number of practical resources (such as pastels, shaded pencils).
ArtRage supports unlimited layers and is compatible with all industry-standard blending modes. Using the "Metallic Tinting" feature, you can also add reflectivity to pigments. If you want to use an existing photo as a guide for painting, the same can be done by importing it as a tracing image. The app even samples colors from the tracing image automatically, allowing you to focus on brush strokes.
The full version will let you'll receive all future updates included with your license. The ArtRage Lite version is great for beginners and includes all the painting features of the full version.
You can also use the demo version for an unlimited amount of time. The demo doesn't let you save anything, which of course is a drag, but you can use that to familiarize yourself with the program.
If you've never used digital painting software before then ArtRage is fantastic. It's beginner friendly and super affordable. It doesn't have all the gadgets and gizmos that some prominent art programs have, but it's got all you need to make fun paintings(and a little extra).
What are the valuable techniques to get better at digital painting?
With the help of the growing software and innovation, digital art painting is not very much difficult. You can create multiple paintings or edit them easily. But, if you know about all the amazing techniques of digital painting then you can make it easier and better.
Techniques you should use while doing digital art
Use the default while and light color canvas.
Use limited colors If you don't want to make your painting dizzy.
Copy Colors from reality.
To paint use a big brush.
Get familiar with your software before using it.
Learn the value of the colors.
List of free digital painting & drawing software
Many o the users are not able to afford high or low-value editing software. So or all those here comes god. The below-mentioned software is free of cost through which you can create a painting. Add the best software to your device to create a beautiful painting.
6. Sketchbook
Platform: Windows, Mac OS, Android, iOS | Price: $85/year ( SketchBook with Enterprise license )
In April 2018, Autodesk made the SketchBook drawing program absolutely free. No hidden costs, no subscription fees — all you have to do in order to use this drawing software with all its premium features is simply create an Autodesk account.
As the name suggests, Sketchbook gives you an interface similar to a sketchbook, with tools panel to pick brushes & rulers from to help you draw. the straightforward design makes it ideal for beginners. this feature-loaded digital art software sports a minimal and elegant UI that stays hidden until a tool/option is needed, allowing you to work sans any distractions.
Great for all drawing but especially for sketching (as the name suggests), it is simple to use but flexible and customizable enough to really put your own personality on the art. Its drawing engine can handle canvases up to 10 megapixels in size while still maintaining precision and speed.
Sketchbook comes with a variety of drawing tools, including pencils, inks, markers, and more than 190 customizable brushes that can work with both textures and shapes. As an added bonus, you also get access to the exclusive "Copic" color library. Those who have just started their journey as digital illustrators can benefit from the program's built-in assistive wizards, which come with features like 16-sector radial symmetry and predictive stroke, which automatically smooths out lines and corrects shapes.
Autodesk SketchBook lets you export your artworks in a variety of formats, such as PNG and TIFF. It also supports layered PSD files that are fully preserved with a wealth of information, including layer names, groups, and blending modes.
SketchBook software is used for creating expressive drawings and concept sketches. The software also supports screenshot tools for adding notes and annotations. You can also create flipbooks and animations through this best digital art software.
Sketchbook comes in two versions, Sketchbook Express, which is free, and Sketchbook Pro, which is still affordable if you liked the Express version but wanted the additional features. I used Sketchbook before for some time, and I have always admired the clean interface it had. Since it's free, I don't see a reason not to try it.
7. Krita
Platform: Windows, Mac OS, Android,Linux/ubuntu

Krita is a free open source digital painting program designed for cartoonists, illustrators, concept artists, and pretty much all digital artists.
Many professional artists like David Revoy create all of their work with Krita and their stuff looks amazing. If you don't have the cash to burn on digital art programs Krita is the perfect choice.
Its user interface is made up of panels which can be moved around to set up a custom workspace, and you can also configure shortcuts for commonly-used tools. It's beautifully designed, intuitive and offers a range of tools, right up to advanced level.
The program comes with 9 unique brush engines (e.g. Color Smudge, Particle, and Shape) that can be tweaked extensively and then organized using a unique tagging system. A pop-up palette lets you quickly pick colors and brushes while the resource manager makes it easy to import brush and texture packs from other artists.
Krita features a "Wrap-around" mode that allows you to create seamless textures and patterns, whereas the "Multibrush" tool can be used to mirror illustrations about multiple axes to achieve a kaleidoscopic effect.
Other noteworthy features include full color management support (using LCMS for ICC and OpenColor IO for EXR), vanishing points, customizable brushes (save and reuse), templates, perspective tools, PSD compatibility, and brush stabilizers.
There are also plugins within the platform that let you create your own widgets for python scripting. it's really the best digital painting alternative for our Linux & Unix friends.
Its main focus is on the artistic painting for cartoons, anime or canvas art, meaning that some features that you may need for photo editing or image manipulation were not prioritized in development.
Krita has been under development for more than a decade and is loved by professionals and amateurs alike. Hard to believe it's free really but it is. the only way you can support its creator is by donating.
8. MediBang Paint Pro
Platform: Windows, Mac OS, Android, iOS

Another drawing software program that heavily focuses on Comic Book and Manga art and illustration, designed especially for beginner creatives in this sphere. It fast, simple and it's all for free.
Pre-installed backgrounds (over 800) , more than 50 brushes, a huge selection of free fonts , easy comic panel creation tools and a large selection of other tools. You can create photorealistic images through this art and design tool.
The cloud support feature lets you share your piece of art with other pencillers, colourists, writers, and inkers. you can Quick and easy transfer between devices without the hassle of carrying extra storage devices.
Medibang Paint is a full-featured drawing application. Its features include Auto-file saving, Drawing tools-it with multiple settings, Selection tool, and Keyboard shortcuts similar to Photoshop.
Medibang is a devoted drawing application not a photograph altering application. Medibang supports Wacom , XP-Pen and Adonit styluses. We have to sync the styluses so as to utilize pressure sensitivity. Check out to create stunning paintings .
If comics or manga art are your thing and you don't want to shell out for Clip Studio Paint, have a look at Paint Pro from Japanese company MediBang. there is nothing bad about this free drawing design software .
MediBang Paint Pro Vs FireAlpaca:
FireAlpaca and medibang are both made by the same company. That explains why many features between these programs are quite similar, and why the brush workflow is great in both of them.
It's hard to point out differences between them, except for Medibang's cross-platformity and cloud tools. This, in turn, leads to MediBang Pro being compatible with a larger number of tablets ( ipad , surface....), while FireAlpaca is mostly optimized for brand names like Wacom , XP-Pen...
FireAlpaca gets the new development or upgrade of new features in weeks or months. The features that might not ever be in MediBang .
Firealpaca's pen pressure is not that smooth. Besides, you cannot install it on phones and tablets. But you can download MediBang on any device.
9. Mypaint
Platform: Windows, Mac OS, Linux/ubuntu

MyPaint has been around since 2008 and its development model is contribution-based, with the latest stable version released in 2016. The app is open-source, simple, and stable. The UI is pretty up-to-date and feels more modern than, for example, Paint.net.
MyPaint supports layers and basic color adjustments. It also has cool features, like symmetry mode, connected lines, and curves. Adjustable brushes configuration and easy stroke stabilization in a relatively big selection of drawing materials and pencils will suit your needs perfectly.
You can use lots of brushes to draw and sketch with My Paint. The effects, you will use here are like pretty much handmade paintings. You will find so many drawing tools here. Such as 2B pencil, Watercolor, 4H Pencil sketch, airbrush, etc. There is also sponge, ball pen, blending, spray, etc. are available.
Your eyes and mind will be resting while drawing in this open-source painting program. We've brought up minimalism so often, talking about display and interface, but here these benefits are reflected via a unique full-screen mode without distractions on your canvas.
It's well-optimized for working with graphics tablets, so the brush flow is smooth and glitch-free, which is great . Mostly if you use the Symmetry tool, Lines, and Curves: it's possible to preview the Pressure Variation for Lines and Curves.
Unlike trying to install heavier drawing solutions, MyPaint is easy on computer resources, so using it on old laptops and PC's is a great option.
Overall, MyPaint is a perfect choice for light sketching work, if you don't need advanced features ( animation tools... ) and want to rationally use system resources. For sharing your creative ideas with easy drawing then it is a perfect free drawing software for you.
10. Artweaver Free
Platform: Windows | Price: € 34 ( Plus Version )

Artweaver free digital art software is used for drawing creative works by both beginners and professional painters. it's particularly useful for children. Kids love experimenting with all the different brushes. if you're using it for commercial use , then you need get the Paid Plus edition.
Relatively easy to use and with a simple enough interface. There is the ability to work with layers, import and export graphics in various formats. so you can build up your masterpiece in layers without losing the ability to change anything.
A user is offered a rich set of various brushes (chalk, charcoal, pencil, acrylic fibers, sponge, oil). The painting brushes are highly configurable, and users can configure them as per the new variant or new category. You can also customise the palettes for brushes, presets, and shortcuts.
Artweaver also has all kinds of filters that can be used while editing drawings (wind effect, blur, waves, granulation, oil effect, etc.). Moreover, this best free drawing software has the feature to draw textures. Artweaver also has Plugins Pack that contains many additional filters.
Artweaver Free enables you to create beautifully realistic digital drawings by taking input – from your mouse, a stylus or, if you have a touchscreen PC, from whatever you feel like tapping the screen with – and applying ultra-realistic brush effects.
Some users call this free paint program as an analog of Corel Painter, while others claim that Artweaver is close in functionality to the fifth version of Photoshop. Anyway, Artweaver allows you to perform most standard photo-editing operations efficiently. It far surpasses the built-in editors of graphic viewers.
11. Gimp
Platform: Windows, Mac OS, Linux/ubuntu

Gimp is one of the oldest raster graphic editors that's free to use since it's early release in 1996. It has a wide and devoted user base with many tutorials and documentation available online.
Up until the 2018 year many new users were skeptical towards adopting the program, since for years it has had issues such as outdated UI, jagged brush work and poor performance on new PC's. However, the big April 2018 update addressed all of these, being the result of six years of work (the previous version of Gimp was released in 2012).
Unlike other free digital art software, GIMP was designed to be a full replacement for Photoshop. This means you can use it for digital painting but it's really meant for graphic design, photo editing, text effects, and similar features.
Gimp was always more of an image editing program than a drawing one. With all the latest updates, its functionality is almost on par with Photoshop's.
This free painting software has a large number of tools that are available in Photoshop: layers, masks, color grading, smart selection, brushes, filters, and tons of other features. The other tools can be added by using third-party extensions. However, the interface and hotkeys are peculiar here. If you're used to Photoshop, you'll have to relearn.
The interface might seem a bit cluttered compared to Krita and Photoshop , but with use, you'll get used to it in an instant.
GIMP allows easy integration with several programming languages such as Python, Perl, Scheme, etc. Its highly customizable UI gives artists the power and flexibility to create their unique designs.
The painting tools are reasonable, although in my opinion Krita is a stronger option if you just need painting. This is especially useful if you want to not only draw and paint but also do some photo manipulation and fine-tune your own photos.
However, Gimp has a lot to offer digital painters as well. The newest version includes long-awaited updates for the brush work (symmetry painting, hardware pixel processing) and canvas management (rotating, flipping, previewing). Granted you can find plenty of free GIMP brushes all made for digital drawing & painting.
Gimp supports almost all the image file formats such as PDF, JPG, GIF, PCX, MPEG, BMP, TGA, TIFF, XPM, PNG, etc. Developers also polished PSD import, and added new image formats (OpenEXR, RGBE, WebP, HGT).
12. Paint.net
Platform: Windows

Paint.NET literally looks like MS Paint 2.0. It's a great free alternative to Photoshop and Gimp. The developer actually aimed to make Paint.NET a more sophisticated version of Microsoft Paint.
Paint.NET is obviously more advanced and it can do complex tasks like using multiple layers and blending while it manages to maintain a user-friendly interface that's intuitive. This free digital art software perfectly copes with the task of drawing volumetric models, moving objects, and transparent structures.
The tool supports all the features one may need for all-around editing of images: layers, adjustment modes, and special effects. You can get rid of red eyes, blend images or adjust color as effectively as with any other feature-loaded analogue. Paint.NET also supports extensions, if you want to expand its capabilities.
It is a user-friendly drawing tool and you can do amazing works with it. The collection of paintbrushes is common to all painting software. Its easy tools and layers made it special for image editing and manipulation work. Additionally, this free paint program allows you to get images from the scanner and enhance it.
You can use a pencil, pen, paintbrush, etc. in different sizes here. It allows you to insert various shapes like square, rectangle, circle. Available texts, stars shape, arrow, etc. will amaze you.
Various effects such as blur, sharpness, etc. are very attractive in this software. And there are no simple words for tools. The tools are amazing and they will give you a premium feel in your drawing.
Paint.NET does not offer some of the features Photoshop and GIMP offer like supporting PSD files, but you can install plugins such as a PSD plugin to access those files. It just doesn't offer some features natively. Paint.NET is one of the fastest image editors available and it can run in almost two dozen different languages.
Some important features are missing in this apps such as Dodge and Burn tool, limited brushes. Another problem is you can't edit texts after applying effects. Though this software has some issues it has many other special offers. So, if you want, you can give it a try.
It is a perfect match for those looking for quick photo and image editing, without skimming through pages of tutorials and additional menus. Besides, it can work quickly even on low-powered devices.
The graphics tablet
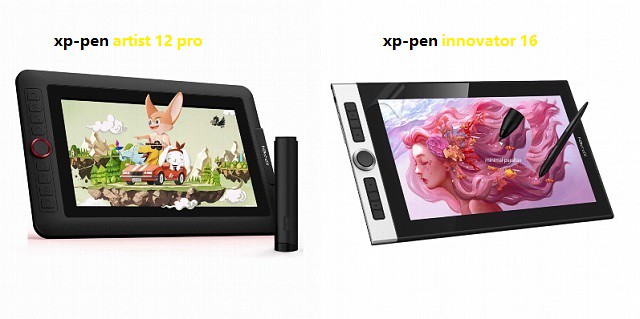
The main drawing tool of the digital artist is undoubtedly the graphics tablet. you can choose between a tablet with a screen allowing you to see what you are drawing directly on the operating area, or a tablet without a screen which are more affordable and more transportable.
With or without a screen, it allows you to retranscribe your drawing directly onto your computer screen, taking into account the intensity of your pencil stroke thanks to pressure sensitivity technologies.
Many graphic tablets exist, but an A5 format is generally a good compromise to start in the digital painting world. It allows you to have a portable digital tool, taking up little space on your desk, while keeping enough work space for a good comfort of use.
If you have not used tablets before and aren't using a pen/pencil all the time daily, it might be a good idea to consider a screen tablet, as that hand-eye coordination takes quite a while to develop. I've used XP-PEN graphics drawing tablets since 2016 or so and I don't myself see much point in having a screen. But that depends a lot on the person.
On the other hand, nowadays you could buy a 4k 43" screen and use that with a screenless tablet to get a lot drawing real-estate; you can fit quite a few life-size heads on that screen and it also easily fits to your budget with a drawing tablet.
There are definitely benefits of having a screen tablet, as you can see the things you are drawing. Obviously it's a bit more like having a drawing paper/painting in front of you. But remember that your hand is there blocking the view more often than not. So you need to develop that habit of moving your hand away and drawing.
And depending on how greasy your hands get, you usually have to resort to drawing gloves (either just buy cotton gloves or those pricey specialized few fingers -tablet gloves) and get used to the chore of cleaning the screen quite frequently (daily).
On the other hand, the traditional no-screen tablet can get quite dirty before it makes drawing difficult... And the screen models can be problematic depending on your work-space lighting, so you might have to adjust that lighting too. Move lights, add a dimmer to light etc.
Conclusion:
Digital art software helps create illustrations and art forms that can be previewed for further alterations. As a user, you don't have to be a professional or trained artist to use the program. Even beginners with an interest in the art can start by using any of the above painting free digital art software.
In this post, you get familiar with the valuable and effective Digital painting software. The latest version of all the software is amazing. You can create any fascinating art with any of this software.
But, If you ask us which one is best of the paid software then we will recommend you Clip Studio Paint. Because it provides you several amazing painting tools, features, etc. So, purchase the best one and start creating a master.
For a beginner, using free drawing software is an easier solution. Among these 7 best free drawing software Krita, Sketchbook, MediBang is the best. For photo or image editing Gimp and Paint.Net would be the best choice. But all these free software are fascinating.
But when it comes to deciding for the best digital painting & drawing software, it can be tough to make good decision. You can check every software by downloading them and try out.
The ultimate decision is yours. You can buy premium software or use one of these. But we tried to help you and we are happy to help you.

12 Best Free & Paid 2D Animation Software for beginners and professionals
The animation industry is much in demand since a decade. It is because animation serves many purposes. It simplifies the message you want to convey, holds people’s attention better than other types of content and educates and entertains at the same time.
2D animation software have gained a lot of popularity and are being used in a wide range of projects. Which can help you out in making funny cartoons, illustrations, explainer videos, or informative shorts.
You will be amazed to know that 2D animation is rooted deep in the history of movie-making and has now become a wild thing. 2D animation software also comes handy to make illustrations for games and mobile apps.
2D animation software is often required for the creation of complex animations and are used by professionals like game developers, cartoonists, architects and artists. Some of the main features that are looked for in a good 2D animator are motion & animation, production environment, proper input & output system, character creation and stage & SFX.
Creating exciting and intricate stories has become an interesting and fun activity with the advent of so many 2D animation software.
You can unleash your imagination and build interesting and funny characters, and more. You can then use your creations in presentations, advertisements, or simply add them to your website.
Are you scavenging for the top 2D animation software for PC? Then you are in the right place. This article will be covering some of the best 2D animation software with their pros and cons to help you find the one that suits your needs.
Some of them are free and some of them are paid. But before choosing a 2d animation software you need to know about the important features of those softwares.
Top 10 best software for 2D animation
There is nothing called Best animation software. It highly depends on what you want to do and achieve. Sometimes it also becomes a personal preference. There is a number of animation software to do different jobs.
1. Toon Boom Harmony
Platforms: Windows, Mac OS | Price: Paid

When it comes to digital production, you can count on Toon Boom Harmony as it is considered as the gold standard in the field of 2D animation.
You can create art and emotion in a variety of styles with this end-to-end animation software. Whether you prefer to have a cutout or paperless animations, Toon Boom Harmony can be the best choice to set the trends for top-notch and award-winning animations.
It is designed for 2D animation but has 3D control over the stage, allowing you to see and manipulate objects on multiple layers in a 3D environment. On top of this there is control over cameras which other software packages do not incorporate. It has the best of both worlds when it comes to hybrid animation tools.
The latest in shading, lighting, and special effects can give more life to your series and characters. It has three packages naming essential, advance, and premium.
Toon Boom Harmony is one of the best paid animation software. It might be expensive for beginners. However, it has a perfect interface, intuitive controls, streamline environment and is used by professionals the world over to produce some of the best animations on the planet. Some examples of this are, Family Guy, Archer, South Park, Rick and Morty, SpongeBob, Bob's Burgers, Simpsons, and Clarence just to name a few.
Toon Boom Harmony features of Advanced color pallettes and painting options , Cut-out animation tools and Conventional paperless animation . It is best suited for narrating a story through 2D images, creating an art piece, or creating a message for your audience.
It is professional software that contains vector and bitmap tools to create art, 3D imported models, and best suited for creating multiplane scenes with z-depth. It may take some time to master the learning curve of this software; it is worth it.
2. Adobe Animate cc
Platforms: Windows, Mac OS | Price: Paid

This software, once known - not that long ago as Adobe Flash and before that as Macromedia Flash has been around for almost 20 years. This gives you a wonderful collection of learning resources from online courses, DVD's, web videos, books, and entire sites devoted to animating in Flash.
It is very easy to use. A variety of layouts for every screen size and monitor setup. The timeline and stage are easy to navigate, making it simple to create walk, run and other cycles, and then embed them in other videos to allow for reusable animated sequences. Pressure sensitivity when drawing with a graphic tablet, and the ability to scrub through the audio when synching dialogue.
If you need to create vector graphics and animation, Animate is the right tool for you. Excellent vector brushes in all sorts of styles for being able to create a large variety of characters.
We can use Animate CC to create a variety of animated content such as animated cartoons, advertisements, games, and other interactive content to publish on platforms such as HTML5 Canvas, Flash Player & Air, WebGL, or custom platforms such as Snap SVG. It includes an option to add certain actions without having to actually code. More Possibilities in the Future.
Animate CC has the new ability to export a project as an .oam file, making it possible to directly import your work into Adobe. Creative Cloud membership allows access to all latest features and fixes as well as other software you might find useful .
Adobe Animate offers support for video and audio embedding, ActionScript scripting, rich text and raster graphics.
The final work that you can create using Adobe Animate stands out from others because you can achieve high-quality results through frame-by-frame animation that lets you create more expressive characters.
Animate is one of the best 2D bone animation software. For more realistic effects, it includes bone tool animations so you can add bones to your characters.
This 2D animation software can bring banner ads and cartoons to life by the terrific feature that it offers. Artists can create animated avatars and doodles quickly and effortlessly as compared to other tools available. Intuitive layout, so that even the common user can easily get used to it . This is among the cheapest and cost-efficient tools available in the market.
3. Moho
Platforms: Windows, Mac OS | Price: Paid

Moho was formerly known as Anime Studio and offers everything you need to create eye-catching animations for presentations, games, illustrations, storyboards, etc. It's a proprietary vector-based 2D animation software for animators. You can easily import and export vector files in this application.
It offers two version, the Debut and the Pro . The first one doesn’t have all the functions that the Pro version has, plus the Debut version is a bit more restricted in terms of possible length and image size. The debut is for hobbyists and beginners while the pro offers working professionals its most advanced tools.
Moho is more of a “purpose built” tool that is heavily focused on rigging and animation of characters (though it does have a frame by frame workflow as well.) . It allows you to create unique textures and effects for the characters. You can expand your animation toolkit, which will improve the quality and workflow of your projects.
It has many great and intuitive 2D-vector drawing tools. You can even fade the color of your 2D vector into another color and into a fourth and fifth color easily, while its being animated.
Adding and layering soundtracks or vocals is easy to do in it as well. You can easily fade them in or out. now it offering the brand-new freehand drawing capabilities, bitmap options.
It has a complex bone system for rigging and even supports the Unity engine. You have an option to use multiple layers for carrying out complex animated tasks. And, its amazing bone-rigging capability lets you skip frame-by-frame animation, as it enables you to add skeletons to characters easily, saving you a lot of time, while creating a sequential timeline.
There are several good videos online on how to work with the software focusing on scene setup, character creation, and audio synching. The only thing that is a drawback is that it has quite a steep learning curve. The tools are not as intuitive as other software packages, the timeline is not as easy to work with and manipulate and if you have ever used another environment there is a lot of unlearning you will have to do to move over to this package. However. For the price if you are just starting out it is a great go to.
4. TVPaint
Platforms: Windows, Mac OS , Linux, Android, AmigaOS | Price: Paid
A french animation software, TVPaint is the all-in-one 2D animation software you’ll ever need. it simulates animating traditionally, with pencil and paper. It has been used to create many animated and otherwise movies.
It's based on bitmap technology. No confusing vector art or tweening or keyframes vs regular frames. If you want to animate traditionally and redraw every frame, use TvPaint.
Thanks to this technology, you can animate natural renderings (gouache, watercolor, oil painting, crayon, pen…) traditionaly (image by image). TVPaint doesn't impose a graphical style nor a workflow. Feel free to mix animation on paper and digital animation, do rotoscopy, use different software or simply make your project with TVPaint entirely.
You will get all the essential tools and feature to animate efficiently without the paper stage. Navigating across the images in the timeline like image marks or bookmarks is handy with this 2D animation software. The flip-flop feature enables the user to customize the preview of the animation by conveniently setting up the shortcuts. The out of pegs can be used to adjust the Light table display through rotating, moving, and scaling. You are going to love this tool with improved features.
Tvpaint enables you to modify live camera parameters like tint, luminosity, hue, etc. This tool enables you to manage the layers and images. You can make storyboards and view them instantaneously as animatics. You can touch up images with a drawing tool . It allows you to combine many FX (effects) within the FX stack. You can use a graphics tablet to handle the opacity, size, jitter, and angle of brushes in real-time.
But not everybody has an extra thousand dollars to spend on TvPaint, so I think you should look at multiple programs before choosing one. This software is for professional animators and studios.
5. OpenToonz
Platforms: Windows, Mac OS, and Linux | Price: Free

Opentoonz is most certainly an amazing free 2D animation suite if you want to get into REAL 2D (frame by frame ) animation. It won’t hold your hand like other expensive software and you won’t have a simple time creating silly potato heads that can talk or stick men jumping over buildings. It is aimed at animation ARTISTS - people who can draw, animate and create.
So OpenToonz is a new free, open-source animation program that has been used by Studio Ghibli and on shows like Futurama and Steven Universe. Studio Ghibli is the Japanese anime film studio responsible for movies like My Neighbor Totoro, Princess Mononoke , Spirited Away and Kiki’s Delivery Service.
You can also plug-in SDK effects and change picture styles using artificial intelligence. This includes changing picture styles, affected incident light, wavy distortion, digital painting,compatibility with raster and vector etc. As an animator, you can freely add any specialised effects to OpenToonz, thereby creating stunning animations.
A fun fact about OpenToonz is that it has a high level of customization. The software has a wide range of keyboarding shortcuts to use for easy access in rendering and animating your projects and has an impressive variety of animation effects including lighting effects and picture styles. Some of the features include onion-skinning and frame-by-frame animation, so you don’t have to redraw your work at every frame.
Just like the paid version, OpenToonz is great to use. It combines both traditional drawing and 2D animation and has many features (dynamic palette, tweening coloring, bitmap tools etc).
OpenToonz features extremely powerful drawing tools which help in scaling and modelling of animation features. It’s very efficient when it comes to frame-by-frame animation and along with features such as tweening and tracking; the frame integration is almost seamless. Scripting is another convenient feature added to its list. Particle Systems are another of its added features which help in minute and intricate animation tweaks.
It is compatible with 4 types of scanning. It allows you to save settings of scanning. To animate a drawing, you just have to scan it. users can modify the source code to add specific features to this simple animation software. So, once the user has got enough knowledge and expertise about this tool, he can bend and mold the toons to his whim. But for beginners, getting started with this software can be a little bit daunting.
However, the downside of Opentoonz is that the design of its user interface is outdated compared to other 2D animation software in the market. Regardless, users would still have an exhilarating experience.
6. Synfig Studio
Platforms: Windows, Mac OS, and Linux | Price: Free

Synfig Studio is an open-source, free timeline-based, and 2D vector graphics computer animation program. Synfig Studio is a real back-end and front-end application, that allows you to design your animation in front-end and render it in backend at a later time even on another computer, without having to connect the graphical display.
Synfig Studio allows users to create powerful animations without having to graph and sketch frame by frame. You can create animations with the help of bitmap and vectors in Synfig Studio and all this can be done just by adopting.
Synfig was designed to look like and work similar to Adobe Animate , so if you've used Flash in the past, you will quickly learn the Synfig workspace. It includes a number of advanced animation tools, including vector tweening, layers and filters, and bones. Synfig gives you a lot of power – and it's all free.
The best thing about Synfig is that it provides more than 50 layers you can choose from to create simple or professional animation. It does not impose any limitations on you. these layers are of various types; geometric, gradients, filters, distortions, transformations, fractal and a few others.
Synfig has basic features for syncing your animation with soundtrack using Sound Layer. Linux users can get all benefits of full-featured audio editors through the JACK integration.
By Synfig Studio, you can transform any vector image into another form as it offers powerful tools to give you full command over your vector artwork. Calculating the frames has never been so handy. You just need to set the key positions, and Synfig will calculate the in-between frames automatically.
You can also enjoy some pro features that are surprising in this free drawing animation software. For instance, Synfig offers support for gradient routes with which you can shade your drawings, manipulate vector lines, use a grid, use onion-skinning and choose from a variety of blend methods for your drawing.
Overall, Synfig is a great application for those who have a little experience handling animation software. The community behind this animation program is one of the best, with hundreds of tutorials and videos to learn from.
7. Pencil 2D
Platforms: Windows, Mac OS, and Linux | Price: Free
If you are into traditional hand-drawn animation, then maybe Pencil 2D is a great software to start your animation project. This free software lets you use both raster and vector graphics and you can switch easily between the two types of artwork. It started as a simple "pencil test" at first and developed into animation software.
Pencil 2D is a cross-platform tool and lets you focus on animating even when you are on the go. Since the software is completely free and open source, users can have access to the source code and add features. No matter if you use it personally or commercially, the features can help you out in every project.
The user interface is simple and intuitive, letting you create your compositions in color, with a pencil, pen and brush tools. Anyone with little to no experience using animation software — even total newbies — will be able to tell at a glance what they can do with the software.
The tool features layers, a timeline with a simple keyframe manipulation system, onion-skinning, colors, pressure sensitivity, workspace toolbars and panels that you can rearrange to fit your animation needs and workspace.
Animators will appreciate the clean, uncluttered timeline where it is quite easy to add new keyframes on different layers, duplicate, change the frame rate and work quickly to create animations with minimal fuss.
It's focused on traditional frame-by-frame animation so every frame is made from scratch. It comes with a manual to learn how to use the program adequately. The program is lightweight and doesn’t use large amounts of RAM, so almost any computer can handle it. It can be used by a graphic tablet and pen.
This best free 2d animation software is lightweight as there are not many tools present in it. It does not support shapes tools due to which it becomes impossible to create or draw shapes. advanced animators may not find that the features are robust enough for their preferences.
Pencil 2D is true to its name, as it fully supports 2D animation only. If you are looking to learn basic cartoon animation principles, Pencil might be a great choice. Moreover, you can easily produce good quality drawings and animations with this free 2D animation software.
8. TupiTube
Platforms: Unix-like, Windows, Mac OS | Price: Free

TupiTube is one of the best free 2D animation software for beginners which created by Maefloresta Inc. It's free and open-source , compatible with phones, tablets, and PCs. It was created by two animators to encourage the animation industry in Latin America. It’s free and open-source, so you can download it to see if you like it.
It’s basically an amateur animation very popular among kids, students, and teachers. Schools and colleges are a market for Tupitube. Its simplistic design and UI is very easy to use for beginners. It also a virtual assist feature to help with the animation process.
Tupitube can help create a range of animation features. Hand-drawn animation feature is the most commonly used followed by Cut-Out animation. Even though it might appear amateurish, Tupitube does have advanced functions such as Rotoscoping and Stop-Motion animation.
It offers features like basic tools for vector illustration, support for tweening of positions and colors, a library panel to organize files, and different formats for exporting. The goal is to eventually reach a professional level for more advanced users.
TupiTube does seem to be focused on hand drawn/traditional animation i.e. the kind where you draw each frame yourself. It comprises of basic illustration tools that are easy to understand for beginner animators. Pencil, color, tweening tools, exposure sheet, import SVG image file and export animations are the key features.
If you have no experience of animation software at all TupiTube is probably a good place to start. The software is aimed at complete novices from children to amateur animators. It’s likely that you’ll be up and animating something very quickly.
From what I’ve seen you could probably use TupiTube to create good quality animation for a web series etc. but that’ll depend on how confident you get with it, and pushing the boundaries of what it can do.
9. Blender
Platforms: Windows, Mac OS, and Linux | Price: Free

Blender is a free 3D Animation software and we can also make 2D animations. Blender is a free animation software that has been able to get a lot of love from its community of various kinds of professional and business owners. It has a wide range of tools that allow you to create 2D, 3D, or even mix 2D and 3D objects in your video.
It has a jaw-dropping rendering feature that allows you to smoothly process layers, characters, background, and other objects in the video. Along with that, you can use its amazing video-editing tools for cutting, slicing, adjusting layers, and more.
As of Blender 2.8, the grease pencil system has been revamped into a full 2D animation tool. we can create the story, script, storyboard and animatics using the grease pencil as a primary tool.
Through its open architecture, Blender provides cross-platform interoperability, extensibility, an incredibly small footprint, and a tightly integrated workflow.
This tool allows you to import or export videos in MPEG, QuickTime, and AVI file formats.
Keep in mind that you need to spend a little bit of time on learning features of Blender before you can fully harness the power of this powerful software.
10. DigiCel FlipBook
Platforms: Windows, Mac OS | Price: Free + Paid Plan

DigiCel FlipBook was Considered as one of the easiest 2D animation software on the market. It come with Free version ( with a watermark) , Lite Version , Studio Version , Pro Version and ProHD Version for different grades. It was created with the intention of duplicating the animation process in its traditional form, much like Toon Boom Harmony and TVPaint.
As FlipBook wants to keep the traditional aspect and the traditional toolkit of the animation, it does not support skeletal animation. Thus each frame has to be created and drown separately and inbetweening is performed via onion skinning.
The toolkit is raster-based and supports direct digital input of a drawing using graphics tablet and scanning the physical drawing via either webcam or TWAIN-compliant scanner.
FlipBook is easy to use for beginners and pros who want to improve the editing experience. It is a powerful video editor that you can make 2D animation with various functions like syncing sound with animation, scanning cells, and more. Want to add sound, just drag a sound file onto the xsheet.
If you enjoy drawing and you’ve always wanted to create your own Disney-like cartoon, this software will suit you well. It's definitely an old-school approach, but if that's the way you roll, FlipBook is the software for you.
11. Powtoon
Platforms: web browser-based | Price: Free + Paid Plan

PowToon is an interesting 2D animation software developed for business use. if you own a small business or a website and you want to stand out in the crowd, this tool will help you achieve that.
PowToon is a web-based animation software that allows users to create animated presentations by manipulating pre-created objects, imported images, provided music and user-created voice-overs. It allows you to move scenery around, props, move your characters.
The user interface is very intuitive and you’ll quickly learn how to use the tool without even watching dedicated tutorials. it enables you to create 2D animation videos online without investing a lot of time in learning new skills and spending money on video equipment.
It’s a great tool for beginners, with several professional-looking templates to choose from, including animated explainer and infographic-style videos, as well as templates built specifically for product promotion. You can also start from scratch or import a theme from PowerPoint.
Powtoon uses an Apache Flex engine to generate an XML file that can be played in the Powtoon online viewer, exported to YouTube or downloaded as an MP4 file. It supports full 1080 HD quality videos, which means that you do not need to compromise simplicity and price with quality.
The wide range of features offered by the free version of this software can’t be ignored. In fact, this is a one stop solution for all your animation needs. Once you start producing and uploading 2D animated videos with PowToon, you can switch to its paid versions to get more features and publish mind-boggling videos.
12. Animaker
Platforms: web browser-based | Price: Free + Paid Plan
In explainer video industry, the demand for quality video is huge. They need a digital vehicle which can explain their business instantly and engagingly like an elevator pitch.
Animaker is a online simple animated video making app which helps a wide range of users to craft videos of studio standard without much training or external guidance. Everything starts with just a simple drag and drop.
Animaker is much like PowToon in that you set up a storyboard and animate the characters or props in that scene. Animaker's helped over 5M people create awesome videos by themselves! And is trusted by some of the world's leading brands. It’s used by companies like Google, Verizon, and Pepsi.
Animaker provides numerous animated characters, icons, properties, BGs, maps, and charts. It is one of the best 2D animation software that helps you to create an ideal video for your organization, presentation, freelancing projects, as well as personal projects.
The software is cloud-based, and was launched in 2014. With Animaker, you can create 2D and 2.5D videos, animated infographic videos, handcraft videos, whiteboard videos, typography animations, and more. it addding a perfect mix of UI experience, simplicity in video making and equally a well qualified video to be proud off.
The software provides online tools to create and edit video animation. Animaker uses both HTML5 and Adobe Flash to create animated videos that can be exported to Facebook, YouTube or downloaded as an mp4 file. The software is also available as a chrome extension in the Chrome Web Store.
Summary
There is a range of premium and advanced animation software tools also available on the internet which comprise even more features and are heavy duty to carry out many animation simulations in one go. But for most of the animation process to take place, the mentioned software in the blog should be more than sufficient.
The best free & paid animation software really depends on your skill level, your hardware, and the types of videos you want to make.
There is a plethora of 2D animation software, and choosing the best one can be challenging. To connect with your audience, you need some visuals to convey your message effectively, whether you want to increase the sales of a business or want to earn some bucks through funny videos.
Thus, it would help if you recked your brain before making the final decision. It is advised that you should check out the features that the software offers along with the price that you need to pay to use them.
Once started with those animation software, sooner or later, you will notice that, drawing with mouse is tedious. Then you may want to get a drawing pad ( XP-PEN , for example).
Also, tool is just tool. To create professional looking animations, you must learn principles of animation. Only then, the chosen tools may help you.
Regardless, we are all so fortunate to have such a great little menu of animation programs to choose from in this day and age. No matter your preferences as a beginner animator, you can find a 2D animation program for you.

Best XP-PEN or Wacom Drawing Tablets for Animation Recommendations

The best drawing tablets for animation are incredible tools for anyone who wants to take their skills to the next level. Thus, whether you are a 2D or 3D animator, you need an incredible digital art drawing tablet to draw storyboards, animate frames, sketch characters, and create backgrounds.
Interestingly, you get to do these right from a digital screen. Doesn't that sound pretty fun-filled and convenient?
Any digital animators who understand and value their trade will admit that graphics tablets are incredibly useful and powerful. They are a must-have for anyone looking to simplify the tedious animation and drawing processes.
While the power and usefulness of tablets are undebatable, not all the models are similar in design and capability. Therefore, your pick will depend on your skills and your objectives.
Why is it better to animate with a drawing tablet
Mostly because it's faster. Way faster. If you've ever worked with a 3D software like Maya or 3D Max you know that you spend a lot of your time looking at the character model and moving its body parts around.
Doing that with a pen feels so much more natural than a mouse, it's like touching the model with you hands. You get more precise with your tweaking and you move around incredibly faster.
Which tablet should you use?

First of all let's assume we're only talking about Wacom tablets, since they clearly dominate the animation and VFX industry.
The king of all drawing tablets has always been Wacom and for good reason. When it comes to accuracy and performance, Wacom has always been the best and in most cases they still are which is why many of the professional artists will always remain loyal to this brand. With the reputation comes a cost as this brand is the most expensive out of all tablet companies out there.
One thing is for sure though, you'll be getting very reliable performance and driver support. Furthermore, Wacom does have more options to customize your tablet pen. There are more different kinds of pen tips and even different supporting pens you can purchase separately to really choose how you like to draw on the tablet.
But now there are tons of tablet brands and models out there. As a person who has used multiple tablets in my lifetime and also doing a lot of research on different tablet brands, I'll try my best to recommend some good models that you can't go wrong with. A lot of the decision making process is really up to what your budget is and what specific features suit your needs as an artist or animator.
About XP-PEN

Committed to digital animation drawing technology for more than 15 years , XP-PEN is now growing to be one of the main manufacturers of pen tablets, interactive pen displays and digital interface solutions in the whole world.
XP-PEN main line of products consists of wireless graphics tablet, usb pen tablet, signature pad, and drawing tablet monitor.
XP-PEN provides multi-media tablets for aspiring, enthusiast and professional graphic artist with the wider choice of products at affordable price range comparing to its competitors in the market.
Best Bang for your Buck – XP-Pen Star & Deco Series

If you're new to animation or art and you're looking to start somewhere to dip your toes into the field, I would highly recommend the XP-PEN Deco 01 V2 . At the time of this article it will only set you back $70 USD for the A4 model which is cheaper than most video games out there!
With that you get a solid tablet with a decent drawing area, a battery free pen with 8192 levels of pen pressure, 60 degrees of pen tilt and good support / drivers. It doesn't come with a built in monitor, but many artists agree that a display tablet is not necessary to get a natural drawing experience. it also having the support to connect to mobile phones/tablets. You can't go wrong with this tablet if you're looking to get started!
Best Overall Tablet – XP-Pen Artist Pro Series

For a bigger budget, you can use one of the Artist Pro models for using the pen directly on the screen. I don't think it's necessary for 3D animation but for 2D animation they are ideal. such as work with OpenToonz , Flipaclip .... anmation software
XP-PEN as a company has come extremely far and I've actually switched from Wacom to XP-PEN which is something that I thought would never happen in the past. If you want an overall good screen tablet for a reasonable price, I don't think you can go wrong with the Artist Pro Series. It comes in multiple sizes of 12, 13, 16 , 22, and 24 inch variants, a nice battery free pen, and the tablet itself is well built.
The reason why I switched from a Wacom tablet to a Artist was because of the price and also the size. The 12 inch version of the Artist pro is small enough to fit in my backpack. For animators and creators looking for a graphics tablet, but still want a professional graded product, then the XP-Pen Artist 12 Pro is a worthy option. It has fantastic build quality, accuracy and precision. It has tilt recognition, 8K pressure levels , 8 Express Keys, and a convenient red dial wheel for functions of Rotate, zoom in and zoom out .
With 2560 x 1440 resolution with 120% sRGB colour support the XP-PEN Artist 24 Pro display is very sharp, line quality in consistent and predictable. with a large drawing surface of 24inch , It's a very worthy contender.
I would say the only thing that keeps the Wacom ahead of XP-PEN is that they have a superior pen and pen accuracy. Being almost half the price of a Wacom Cintiq, this is a great buy for someone who just wants to buy a good drawing tablet without breaking the bank.
Selecting the right animation tablet

Every animator whether a hobbyist or professional will have alternative methods of working, procure different types of animations, and have their own set of bespoke requirements.
Which in truth means that there is very little chance of there ever being a one size fits all, and therefore no tablet that could ever truly be crowned the best. But we can however get as close as possible to this through deciphering and narrowing down certain specifications that are better than others for each animator.
So, before we get started there are a few technical srawing tablet terms you should be familiar with:
Display vs non-screen : We cover the difference between digital tablets and graphics tablets, and since animators require instant real time feedback, we strongly recommend buying a display tablet over a graphics tablet.
However if you are a novice/ hobbyist and/or on a tight budget, a solid graphics tablet such as the XP-Pen Deco range will suffice until ready to upgrade.
Ultimately a good display tablet must provide a clear, sharp and bright output.
Size : The active area on the drawing tablet's screen is the space where you sketch, draw and edit. A larger screen isn't always better and so rather than going for the largest dimensions you can afford, consider where and how it will be used. Not all animation projects require the large 24” screen that the XP-Pen Artist 24 Pro provides, and equally this isn't very portable.
Resolution : Resolution is the number of pixels (display units) on the screen. It is represented as A x B where A is the number of pixels in a row and B is the number of pixels in a column. Therefore, the standard resolution 1024x768 means that a total of 786432 (1024 multiplied by 768) pixels are present on the screen. Each pixel can have a different color. A higher resolution guarantees a more accurate display and a more excellent opportunity to show different colors at the same time.
Lines per inch or LPI index is a variant of resolution that is common in the drawing tablet jargon. If your work involves designing highly detailed images, a higher LPI index is what you should look for.
Gamuts and color space: The range of color a display can show you is called its gamut. Gamut sizes range widely.
The most commonly known color gamut might be “NTSC” ,“RGB” and “sRGB”. They all have their own RGB color coordinates and associated white points and brightness specifications, and of course their own application. For example, Adobe RGB is meant for use in graphic design, mainly for printing purposes.
The selection of color gamut really depends on your workflow and requirements.
Pressure Sensitivity: This just refers to how many levels of pressure the stylus has. It's kind of arbitrary, but you just have to know that the higher the number, the lighter you will be able to press down and still make a mark.
Latency: This refers to the time between you pressing the stylus on the screen, and the tablet actually showing a mark. It's usually really hard to even notice, but with slower devices, it's much more obvious. The lower the number, the more natural and fluid the experience will feel.
Shortcut Button: Hotkeys are the shortcuts that you can use to do your work faster, and smoother. They help you save time. Some drawing tablets come with hardcoded hotkey configuration which you cannot change. These require some getting used to. On the other hand, you can get a device where you can create custom hotkeys for your convenience.
Price: For a lot of us, this is a significant factor and one that may result in not quite initially reaching the drawing tablet goals you set out to achieve.
Be honest with yourself when asking the above questions, as maybe its not the right time to buy that Wacom Cintiq tablet just yet!
Finally
I bought a Wacom Intuos tablet when I was a beginner . I thought I needed one to be more professional. I only used it for drawing in Photoshop , Clip Studio Paint , Paint Tool SAI.... though.
I was a big sluggish at first but I had to push through it. and... Everything changed! Even if it's an old and obsolete tablet, I loved it and I still do ! I'm quite used to this tablet at that time, but I still hope I can get a screen display tablet one day.
My personal experience was that the quality of my drawing took a huge jump when I moved from a tablet to a XP-Pen Artist 12 Pro drawing display monitor. It doesn't feel identical to paper, but if you're serious about art then it's definitely easier to adapt to because you no longer have that disconnect between eye and hand.
Any of the drawing tablets mentioned in this blog are all good buys and they will all serve you well. There are also other tablet models that were not mentioned in this post that I'm sure are very good.
When it comes down to it, make sure to do your research and read on the specifications that each tablet comes with. Watch as many reviews as you can and compare and contrast with other similar models that you are interested in. Once you narrow down your top picks, pick whichever tablet you think serves your personal needs the best.
Other than just starting to use it, the best way to practice and get better and faster with a tablet is to do some exercises.

Best Graphic Drawing Tablets for Beginners: Ultimate Guide For Newbies
Whether you are a beginner or a professional designer, drawing tablets are the useful tools.
Graphic design or coloring can be done on the digital art drawing pad tablet , which is very convenient and fast. It also works well with the graphic design software of Photoshop and illustrator, which greatly improves our office efficiency.
I’ve gotten a bunch of asks about tablets and digital art recently, so I’ll answer them all at once in a post like this again. This will contain only very basic info, but I realize what may seem basic to some is completely new information to others. It’s pretty lengthy, so read more under the cut!
Do you use a tablet or is it in the computer?
yes, I use a graphic drawing tablet , and its not part of the computer, its an extra piece of technology that digital artists buy to make drawing on the computer more natural.
Here’s a stock image of a dude using a tablet. Note that with entry to medium level tablets, you do not see the image on the tablet, only on the computer screen.

The tablet basically maps the location of your hand/pen to a location on the screen to give you control. This disconnection of coordination from where your eyes are looking and where your hand is drawing tends to be one of the harder initial learning curves for people just starting in digital art.
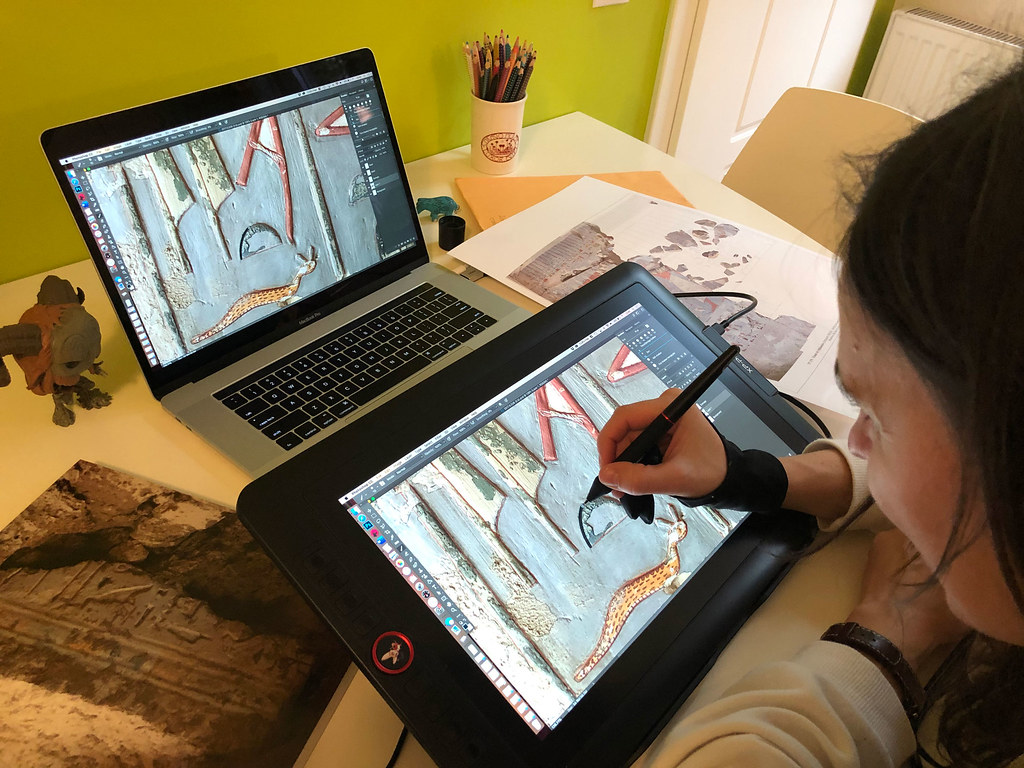
If you want to be able to see exactly where you are drawing, those graphics tablets with screen do exist as well (Wacom’s Cintiq line or XP-Pen Artist line), just be prepared to drop a lot of cash for these, since they cost $200 and up.
More recently in this generation, a meet-in-the-middle solution for a lot of people seems to be with iPads/Surface tablets/etc. More people are likely to already own an iPad, or feel like it’s a better monetary investment for all its uses than a drawing tablet that’s only function is to draw. You still need to buy a pressure sensitive stylus and a program to use. Just do note that paint programs for iPads tend to be less powerful than those for computers, and people who have reviewed both iPad programs and the pen display tablets say that iPad pens don’t feel as natural as the Wacom Cintiq/XP-Pen Artist. Touch screens register touch location based on a physical input (your finger disrupting an electrically charged field on the screen, to be specific) while wacom’s tablets map a more accurate location on the tablet surface based on bluetooth/Wireless signals.
For the price difference, if you are absolutely dying to be able to see exactly where your pen is touching, I would invest in an iPad/pen combo. But honestly, for beginners i would strongly urge you to invest in a non-screen tablet ( XP-Pen Deco 03 wireless drawing tablet starts at $100USD) with a computer program, because computers are just so much more versatile. Try your hardest to get over the initial learning curve with the hand/eye coordination, I promise it will pay off.
What is the tablet exactly for/ why do you need one?
Simply put, a tablet allows you to draw lines on the computer with varying pressure like regular, traditional tools. It’s what allows your art to go for great.

Arguably, everything that is done with a tablet CAN be done with a mouse using the brush settings and a combination of a brush and eraser, but it wastes so much time, and really doesn’t feel like true drawing at all, which kills the fun!
What would take a mouse user a dozen different brush settings to blend two colors, someone with a tablet could do it in just one. It’s also like the difference between trying to draw with a large sharpie marker vs. a properly sharpened pencil.
Although you can arguably create some amazing art with just a sharpie, it severely limits the possibilities of what you can do, making you jump through hoops and bend over backwards to get a similar effect of a natural drawing. A tablet gives you much more control over what you want to do.
What else do you need to make digital art?
An art program is a necessity, because simple programs like MS Paint aren’t going to cut it! You’ll need a program that responds to the pressure sensitivities of the tablet, and there are plenty. The most commonly used ones are Photoshop and Paint Tool SAI , both of which cost money. Like anything on the internet, you can find ways to pirate them, but that’s not my responsibility : There are a lot of free programs that will also do the job, but it’s just harder to find resources on them. The free programs I hear about the most or have been recommended to me are Krita, GIMP and Paint.net.
These days, more and more people are starting to use iPads with special styluses and paint programs as well. I haven’t had any experience with those, but they are generally a little bit cheaper, and buying a stylus + paint program from the app store for people who already own iPads may be a gentler introduction to digital art for most people who already own them.
You also need a lot of patience! There’s not a lot of places that offer art classes where you can just walk in and take a workshop on digital art (yet?) However, there are tons and tons of resources online, you just have to be willing to find them and learn from them yourself!
which brand drawing tablet is the best?

When it comes to popular brands, and which brands you should trust when trying to find the best tablets for digital drawing, Wacom is king. They are the Mercedes of drawing tablets. Their products are high quality, endurant, reliable and easy to use. Even though Wacom holds the biggest part of the market, there are other brands to consider as well. XP-PEN ( https://www.xp-pen.com ) is, in my opinion, one of the best choices because they offer high quality products at reasonable prices.
In the end the choice is yours. As with everything else you buy, you have to decide whether to go for a basic product, an in between, or the best one out there. Cheaper drawing tablets with less functions and lower responsiveness level might be a great option for beginners. You can use them to get accustomed to working and drawing on a tablet, and you can go for a more advanced product later on as you improve.
Tablet surfaces become easily scratched, which puts people off sometimes, but as a 7-year tablet user, I can assure you they are purely cosmetic, and have no effect on its drawing ability. I bought my XP-Pen Artist 24 Pro art tablet with screen 24inch and it was so much cheaper than the Wacom Cintiq 24" price, so I’m really happy about it!!
Side note when buying your first tablet, I personally would say don’t even think about trying to spoil yourself at the start. XP-PEN does an amazing job producing these technologies.
You’ll want to test the waters with the cheapest technology first, and only upgrade to larger sizes/higher models when you feel like your skills are ready and you need it, because you won’t be able to feel the effects of a larger monetary investment until you have the skills and experience. Some people buy the cheapest entry level line and stick with it their whole careers, while others will later on feel the need to upgrade. It’s all up to you.
This is all based on personal preference and experience, but I hope I was able to help you guys.
